Video2X AI upscaling makes it possible to improve blurry or low-resolution videos for free using modern open-source AI models.
Low-quality videos can still contain valuable memories, gameplay clips, tutorials, or old recordings that deserve a second life. The good news is that modern AI tools now make it possible to improve video quality for free, even on a regular gaming PC.
In this guide, I’ll show you how to use Video2X — a free and open-source AI video upscaling tool — to improve blurry or low-resolution videos on Windows or Linux. This article is based on real-world testing and practical usage rather than marketing claims.
Whether you want to upscale old camera footage, improve YouTube content, restore older recordings, or simply experiment with AI video enhancement, this guide will help you get started.
What Is Video2X?
Video2X is a free open-source AI video upscaling utility that allows you to improve video quality using machine learning models.
Unlike traditional sharpening filters or basic resolution scaling, AI upscaling attempts to reconstruct missing details and improve visual clarity. The software can:
- increase video resolution;
- reduce visible compression artifacts;
- improve edge clarity;
- sharpen textures;
- restore older low-quality footage;
- improve anime and real-life videos.
One of the biggest advantages of Video2X is that it is completely free and community-driven.
Instead of paying for expensive subscriptions or cloud-based AI services, you can process videos directly on your own PC.
Important Things to Know Before You Start
Before installing the software, there are several important things you should understand.
AI Video Upscaling Requires Powerful Hardware
AI video enhancement is a demanding task.
Even relatively modern graphics cards can take a significant amount of time to process videos, especially if:
- the video is long;
- the source quality is poor;
- the resolution is high;
- advanced AI models are used.
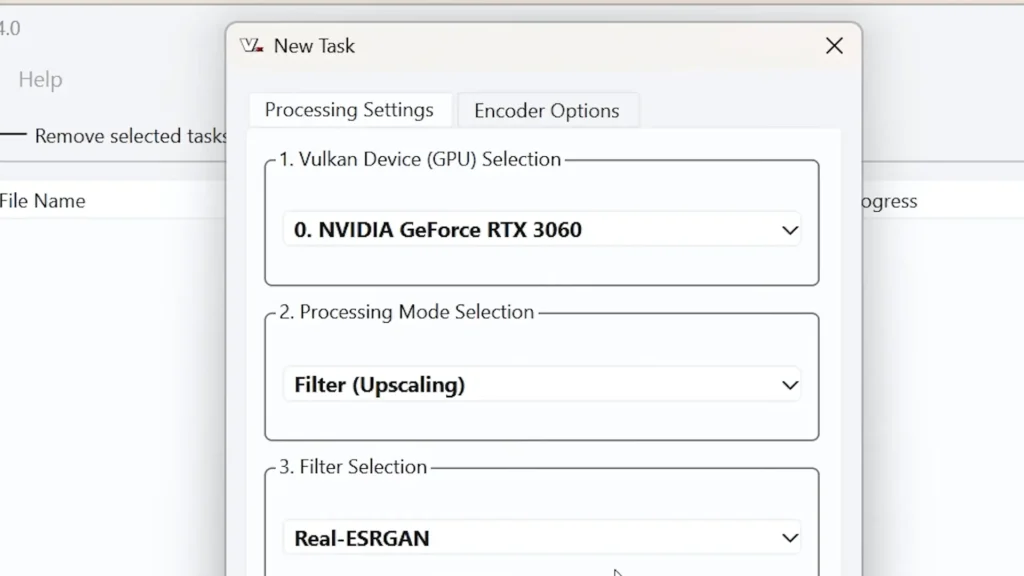
In my testing, I used an NVIDIA GeForce RTX 3060 with 12GB of VRAM, and real-life footage still required noticeable processing time.
Interestingly, Video2X actually performed better on my older RTX 3060 compared to my much newer Radeon RX 9070 XT in certain workloads.
This may sound surprising at first, but there is a reasonable explanation.
Many AI tools and open-source upscaling applications have historically been optimized more heavily for NVIDIA GPUs because CUDA acceleration has been widely used in AI workloads for years.
Meanwhile, AMD’s newer RDNA4 architecture is still relatively new, and some AI-related software may not yet be fully optimized for it.
That does not necessarily mean the RX 9070 XT is a weak GPU. In fact, it is extremely powerful. However, software optimization still plays a huge role in AI video processing performance.
This is something worth keeping in mind if you compare benchmark numbers between different GPUs.
If you only have an entry-level GPU or older hardware, the software will still work, but rendering times may become much longer.
For example:
- short clips may process in a few minutes;
- longer videos can take hours;
- high-resolution exports may require substantial VRAM.
This is completely normal for AI-based video enhancement.
GPU Matters More Than CPU
One important detail that many beginners misunderstand is that video upscaling in Video2X relies primarily on the GPU rather than the CPU.
Your graphics card handles most of the AI processing.
That means:
- newer NVIDIA GPUs usually perform better;
- AMD GPUs can also work well depending on the model;
- integrated graphics may struggle;
- VRAM capacity becomes important for higher resolutions.
If you plan to use AI video upscaling regularly, having a decent GPU can dramatically improve your experience.
Where to Download Video2X
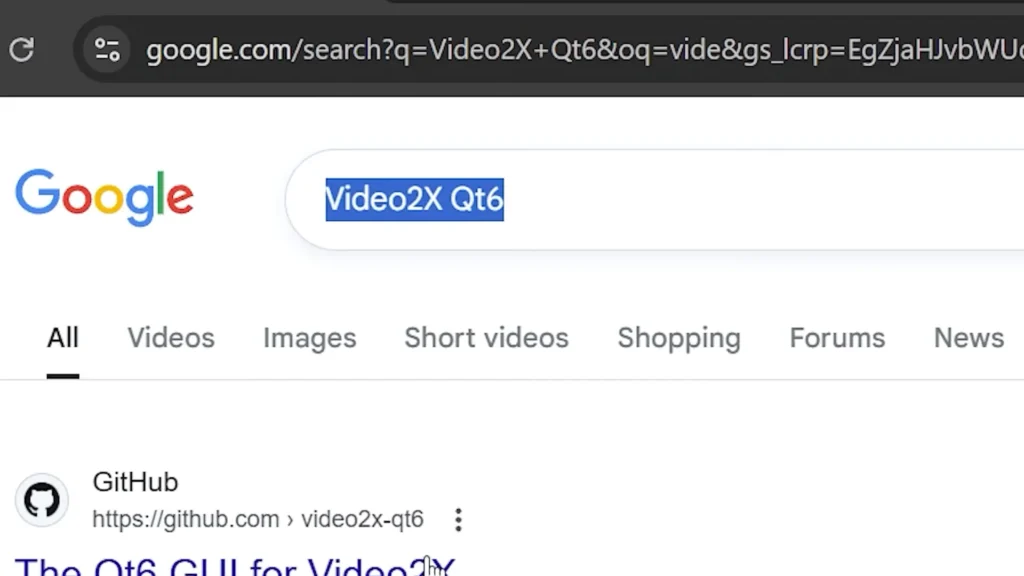
The safest place to download Video2X is from its official GitHub page.
Always avoid downloading open-source utilities from random third-party websites.
GitHub allows you to:
- access official releases;
- view system requirements;
- read documentation;
- verify updates;
- avoid modified installers.
Once you open the GitHub page:
- Scroll down to the download section.
- Find the latest Windows installer.
- Download the installer.
- Run the setup file.
Linux users also have installation options available.
Minimum Requirements
Before installing the software, check the minimum hardware requirements listed on the GitHub page.
This is especially important because some AI models require:
- modern GPU support;
- enough VRAM;
- updated drivers;
- compatible operating system versions.
If the software crashes or performs poorly, outdated GPU drivers are often one of the first things worth checking.
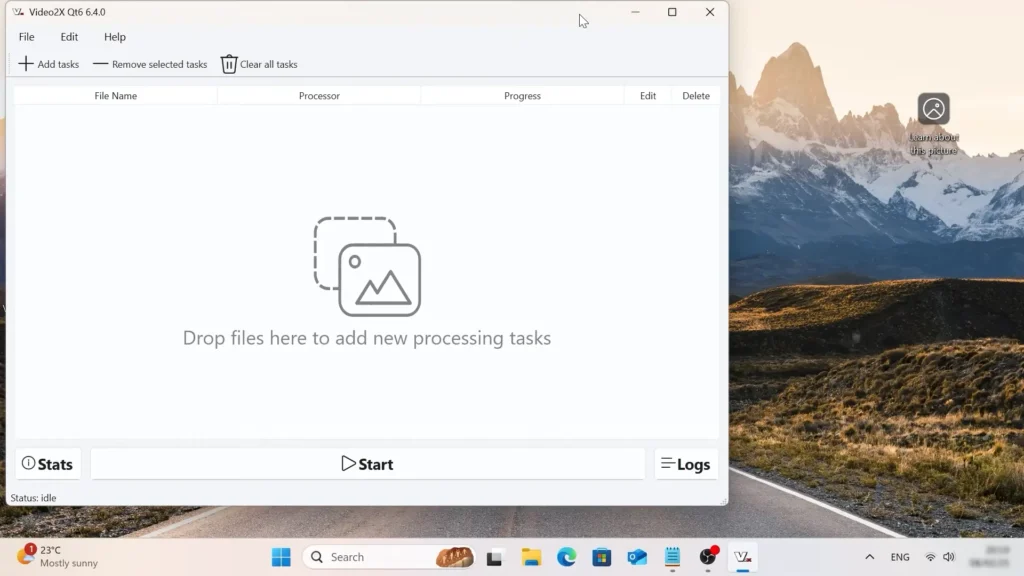
Installing Video2X on Windows
The installation process is straightforward.
After downloading the installer:
- Double-click the setup file.
- Follow the basic installation process.
- Wait for installation to finish.
- Launch Video2X.
There is nothing particularly complicated about the setup.
Most users should be able to complete the installation within a few minutes.
Preparing Your Video
For this example, I tested Video2X using an older HD video clip recorded years ago.
The original resolution was:
- 1280×720 (720p).
The video quality was visibly soft and lacked detail.

This type of footage is a good candidate for AI enhancement because:
- older videos often contain compression artifacts;
- low-resolution recordings benefit more from upscaling;
- AI can improve perceived sharpness.
To import your file:
- Drag the video into Video2X.
- Wait for the settings window to appear.
Sometimes it may temporarily look like the folder window freezes after dragging the video into the application.
In reality, the software is usually just loading the processing interface.
Once the settings menu opens, everything should continue working normally.
Best Video2X Settings for Real-Life Videos
One of the biggest advantages of Video2X is flexibility.
However, beginners may feel overwhelmed by the number of settings.
The good news is that you do not necessarily need to customize every advanced option.
For real-life footage, the default settings already work surprisingly well.
In my testing, I mainly changed one important option:
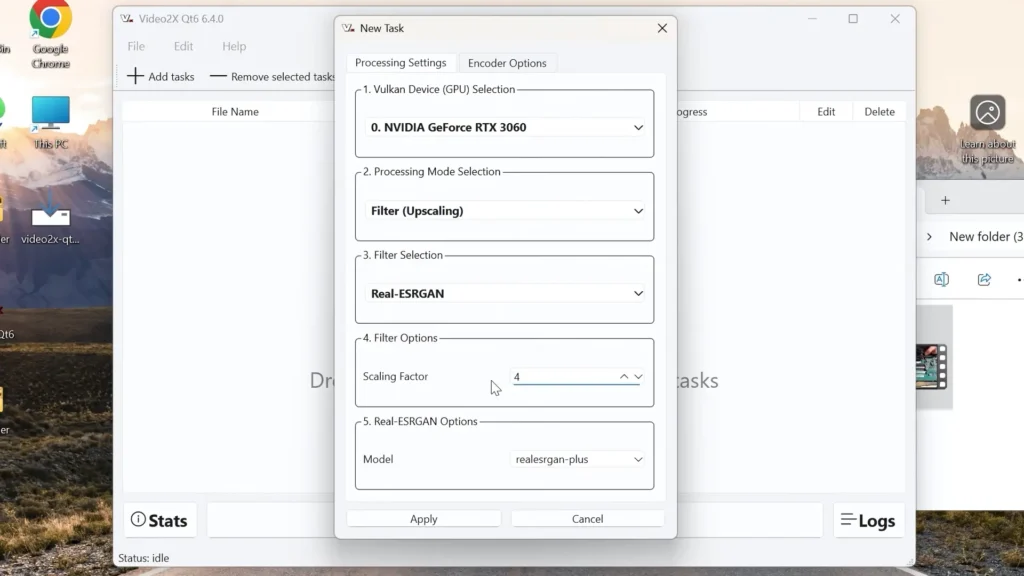
Use the RealESRGAN Model
For real-life videos, the RealESRGAN model generally produces better results.
RealESRGAN is one of the most popular open-source AI upscaling models currently available. It was designed to improve image and video clarity while preserving more natural-looking detail compared to traditional sharpening filters or basic scaling methods.
Compared to some lighter models, RealESRGAN can:
- preserve more detail;
- improve edge clarity;
- create more natural-looking results;
- reduce blur more effectively.
The downside is that it takes longer to process.
That tradeoff is normal.
Higher-quality AI enhancement almost always requires additional processing time.
Understanding Scaling Factor
One important limitation appears when using certain AI models.
Some models lock the scaling factor automatically.
In simple terms, the scaling factor determines how much the resolution increases.
For example:
- 1280×720 upscaled by 4x becomes 5120×2880.
That is a huge jump in resolution.
However, bigger numbers do not automatically guarantee perfect quality.
The final result depends heavily on:
- source video quality;
- lighting conditions;
- compression level;
- camera quality;
- bitrate;
- movement within the scene.
AI cannot magically recreate information that never existed.
In other words, AI upscaling improves perceived detail rather than creating true native detail originally captured by a higher-resolution camera.
This distinction is extremely important because many online demonstrations can create unrealistic expectations about what AI enhancement is actually capable of.
But it can still significantly improve the overall appearance.
Why Source Quality Still Matters
This is one of the most important things to understand about AI upscaling.
AI tools can improve a video, but they cannot fully replace good source footage.
If your original video has:
- heavy motion blur;
- severe compression;
- extremely low bitrate;
- poor lighting;
- digital noise;
- camera shake;
then even the best AI model may struggle.
That said, Video2X can still make older videos look noticeably cleaner and more watchable.
The improvements are often especially visible on:
- old YouTube uploads;
- gameplay recordings;
- archived camera footage;
- anime clips;
- smartphone videos.
Change the Output Format to MP4
After selecting your AI model, I strongly recommend changing the output format to MP4.
MP4 is widely supported and easier to work with.
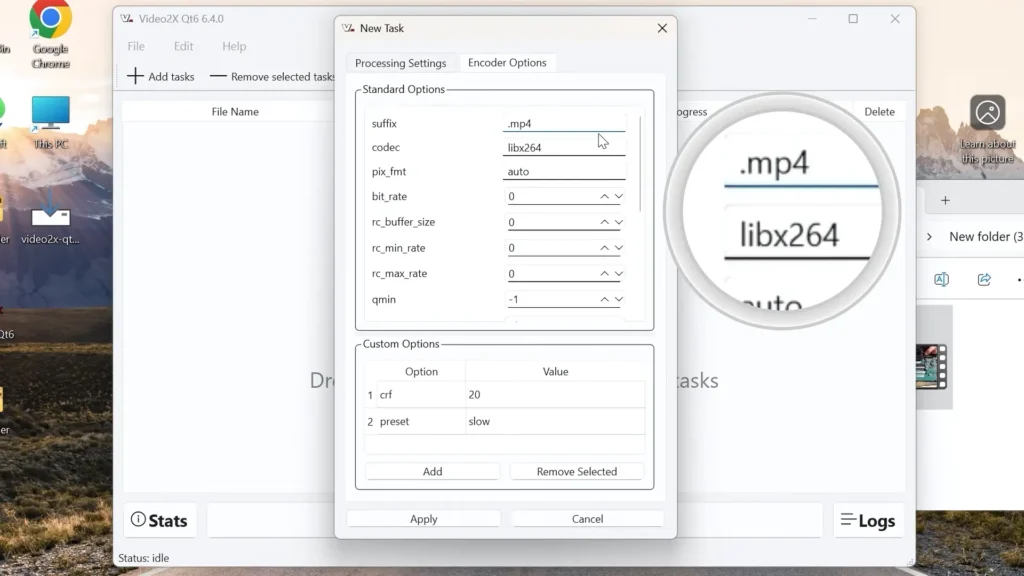
To do this:
- Open the encoder settings.
- Select MP4.
- Apply the changes.
This format works well with:
- Adobe Premiere Pro;
- DaVinci Resolve;
- VLC Media Player;
- Windows media players;
- YouTube uploads.
Using MP4 also helps avoid compatibility issues.
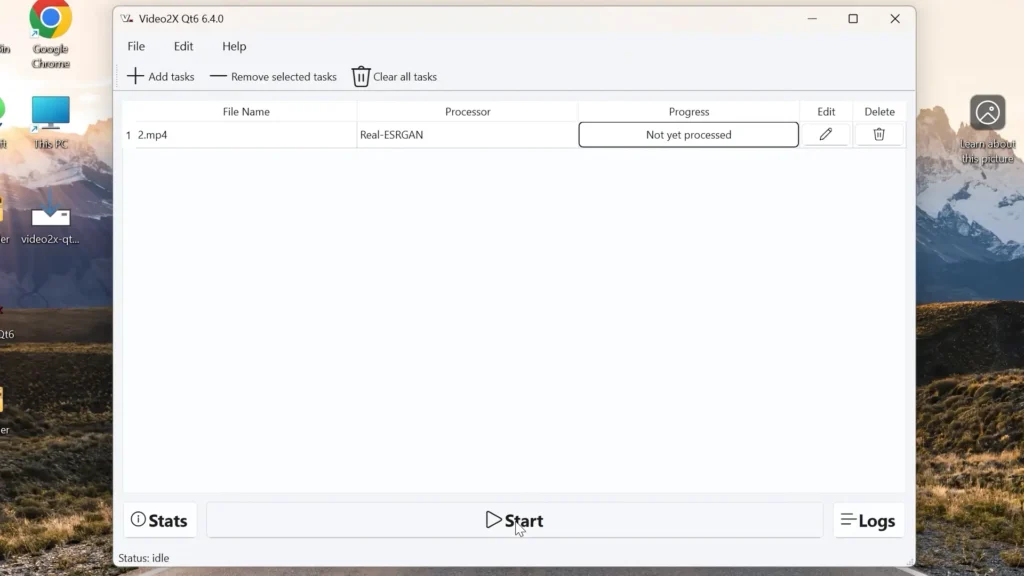
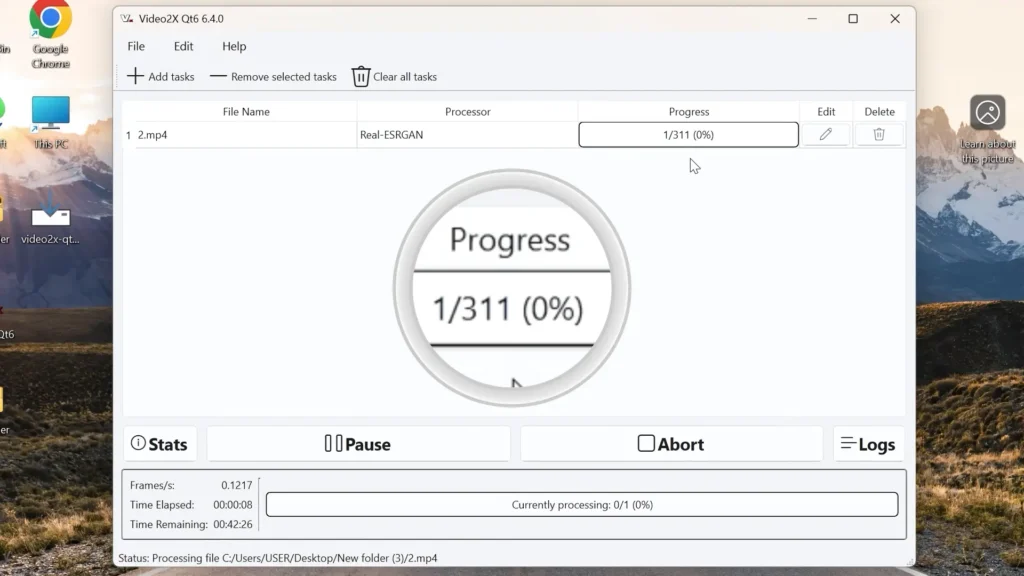
Starting the Upscaling Process
After configuring the settings:
- Click Start.
- Wait for processing to begin.
- Monitor the progress.
Depending on your hardware and chosen model, the software may:
- heavily load your GPU;
- use significant VRAM;
- increase system temperatures;
- take substantial time to finish.
This is expected behavior.
If you notice extremely slow performance:
- close unnecessary applications;
- update GPU drivers;
- avoid multitasking during rendering.
Where Processed Videos Are Saved
After processing finishes, the final video usually appears in the same folder as the original file.
This makes it easy to compare:
- original quality;
- AI-enhanced version;
- file size differences.
I always recommend keeping the original file untouched.
That way, you can:
- compare results later;
- retry using different AI models;
- test different scaling settings.
Real-World Results
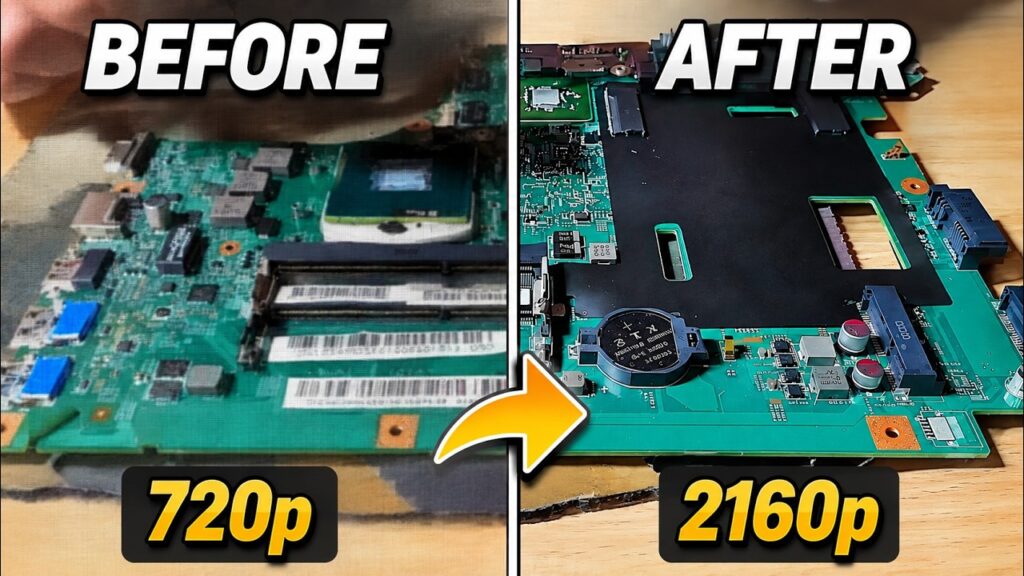
After upscaling my old laptop motherboard video, the results were genuinely impressive.
The enhanced version looked:
- sharper;
- cleaner;
- more detailed;
- more modern.
Edges appeared clearer and the overall image quality improved noticeably.
Was it perfect?
No.
But considering this is a completely free open-source solution, the results were surprisingly good.
That is the key point many people forget.
Video2X is not trying to replace professional studio restoration software costing hundreds of dollars.
Instead, it offers a practical and accessible AI enhancement solution for everyday users.
Faster Alternative Model for Weak Hardware
If your PC is not particularly powerful, there is another useful option.
You can try lighter AI models such as:
- Anime Video v3.
These models process videos much faster.
However, there is a tradeoff.
The quality improvements may not be as strong compared to RealESRGAN.
Still, for weaker systems, this can be a good compromise.
It allows you to:
- reduce processing time;
- lower GPU load;
- experiment more quickly;
- upscale videos without waiting hours.
For many casual users, that balance may actually make more sense.
Video2X vs Paid AI Video Enhancers
There are many paid AI video enhancement tools available today.
Some offer:
- cloud processing;
- advanced restoration;
- automated workflows;
- professional interfaces.
However, many paid tools also come with:
- subscriptions;
- watermark limitations;
- export restrictions;
- cloud upload requirements.
Video2X stands out because:
- it is free;
- it is open-source;
- it works locally on your PC;
- you keep full control over your files.
For enthusiasts, content creators, and beginners, this can be a huge advantage.
Compared to expensive commercial solutions like Topaz Video AI, Video2X requires a bit more manual setup and experimentation. However, considering that it is completely free and open-source, the overall results are still surprisingly competitive for many everyday use cases.
That is especially impressive for users who simply want to enhance video quality without paying for expensive subscriptions or professional software.
Is AI Video Upscaling Worth It?
In my opinion, yes — especially for older videos.
AI enhancement can be useful for:
- restoring old memories;
- improving YouTube footage;
- upgrading archived content;
- improving gameplay recordings;
- making low-quality videos more presentable.
That said, expectations should remain realistic.
AI upscaling:
- improves quality;
- does not create miracles;
- works better with decent source footage;
- requires patience and hardware power.
Understanding these limitations will help you avoid disappointment.
Tips for Better Results
Here are several practical recommendations based on real-world testing.
Use Short Test Clips First
Before processing a massive video:
- test a 10–20 second clip;
- compare AI models;
- monitor GPU temperatures;
- evaluate export quality.
This saves a lot of time.
Avoid Excessive Upscaling
Sometimes increasing resolution too aggressively creates:
- artificial textures;
- over-sharpening;
- unrealistic details.
Moderate scaling often produces more natural results.
Keep GPU Drivers Updated
Updated graphics drivers can improve:
- compatibility;
- stability;
- performance.
This is especially important for AI workloads.
Use SSD Storage if Possible
Video processing involves large temporary files.
AI upscaling can also generate surprisingly large exports, especially when:
- increasing resolution significantly;
- using high bitrates;
- processing longer videos;
- exporting near-4K or higher resolutions.
For this reason, available storage space becomes more important than many beginners expect.
Using SSD storage can help:
- reduce loading times;
- improve responsiveness;
- speed up exports.
Monitor Temperatures
AI rendering can heavily stress your GPU.
During long sessions:
- monitor GPU temperatures;
- ensure proper airflow;
- clean dust from cooling systems if necessary.
This is particularly important for laptops.
Can You Use Video2X for YouTube Content?
Yes.
Many creators use AI enhancement for:
- remastering older uploads;
- improving archived footage;
- enhancing gameplay recordings;
- restoring old tutorials.
However, keep in mind that YouTube compression can still reduce final quality.
To preserve more detail:
- upload higher bitrate exports;
- use modern codecs when possible;
- avoid excessive recompression.
Linux Support
One major advantage of Video2X is that it also supports Linux.
This is especially useful for:
- open-source enthusiasts;
- creators using Linux workstations;
- users avoiding Windows-only software.
Linux support is still relatively rare in the AI video enhancement space.
Common Problems Beginners May Face
Slow Processing Speeds
This is the most common complaint.
Unfortunately, AI video upscaling is computationally intensive.
Even expensive GPUs may take considerable time.
VRAM Errors
Higher resolutions and advanced models can consume large amounts of VRAM.
Possible solutions include:
- reducing resolution;
- using lighter models;
- closing background applications.
Crashes or Instability
These are often caused by:
- outdated GPU drivers;
- insufficient VRAM;
- unstable overclocks;
- unsupported hardware.
Unrealistic Expectations
AI enhancement improves videos, but it cannot perfectly recreate lost detail.
Understanding this helps set realistic expectations.
Why Open-Source AI Tools Are Becoming More Popular
Over the last few years, open-source AI tools have improved dramatically.
Many community-driven projects now offer surprisingly capable alternatives to paid software.
This is especially true in areas such as:
- image enhancement;
- video upscaling;
- audio restoration;
- AI image generation;
- local AI processing.
If you are also interested in improving low-resolution images using AI, you can check out my detailed guide on the best Upscayl AI models for restoring blurry and compressed images.
One of the biggest advantages of open-source tools is transparency.
Unlike some cloud-based AI services, local open-source utilities allow you to:
- process files on your own hardware;
- avoid subscriptions;
- keep more control over your content;
- experiment freely.
Video2X is a great example of how far free AI software has progressed.
Final Thoughts
Video2X is one of the most interesting free AI video enhancement tools currently available.
It may not be perfect, but it offers surprisingly good results considering:
- it is free;
- it is open-source;
- it runs locally;
- it supports modern AI models.
For users willing to experiment and spend some time testing settings, it can significantly improve older videos and low-quality footage.
If you have a decent GPU and realistic expectations, Video2X is absolutely worth trying.
The most important thing is understanding that results will always depend heavily on the quality of the original footage.
Good source videos usually produce dramatically better AI-enhanced results compared to heavily compressed or extremely blurry footage.
That said, even imperfect older videos can often look noticeably cleaner and more modern after processing.
Frequently Asked Questions
Is Video2X really free?
Yes. Video2X is a free and open-source project.
Does Video2X work on weak PCs?
It can work, but processing times may become extremely long.
A dedicated GPU is highly recommended.
Can Video2X improve real-life camera footage?
Yes.
RealESRGAN models are generally more suitable for real-life videos.
Can I use Video2X on Linux?
Yes. Linux installation options are available.
Does AI upscaling make videos truly native 4K?
Not exactly.
AI attempts to reconstruct detail, but the final result still depends heavily on the original source quality.
Conclusion
If you want to enhance video quality for free using AI, Video2X is one of the best open-source tools worth trying.
It combines:
- impressive AI enhancement;
- flexible configuration;
- local processing;
- open-source transparency;
- support for modern GPUs.
While processing times can be long and results vary depending on the source footage, the overall quality improvements can still be surprisingly impressive.
For a completely free solution, Video2X delivers far better results than many people expect.
And for content creators, retro video enthusiasts, or anyone trying to restore older footage, that alone makes it an incredibly useful tool.