Running Android apps on Linux used to mean installing a heavy emulator, dealing with poor performance, and hoping your favorite applications would actually work. Fortunately, that’s no longer the case.
Waydroid offers a completely different approach. Instead of emulating Android, it runs Android inside a lightweight Linux container, allowing applications to perform much closer to native speed. The result is a faster, smoother experience with lower resource usage compared to traditional Android emulators.
In this guide, I’ll show you exactly how I installed Waydroid on Zorin OS, enabled Google Play Store, fixed Play Protect certification, installed ARM translation for better game compatibility, connected a controller, and solved several common issues that many users encounter during installation.
The entire tutorial is based on my own testing, so if you’re using Zorin OS and want the easiest way to run Android applications on Linux, this guide will walk you through every step.
If you haven’t installed Zorin OS yet, you can follow my complete guide on installing Zorin OS on an old laptop before continuing with this tutorial.
What is Waydroid?
Waydroid is an open-source project that allows you to run a complete Android operating system inside Linux using container technology. Unlike traditional Android emulators, Waydroid shares the Linux kernel with your operating system instead of emulating an entire virtual device.
This design provides several advantages:
- Much faster performance
- Lower RAM usage
- Better hardware acceleration
- Faster application startup
- Better integration with Linux
Instead of feeling like you’re running Android inside another operating system, Waydroid makes Android applications behave almost like native Linux programs.
For many users, it’s currently one of the best ways to use Android apps on Linux.
Why Use Waydroid Instead of an Android Emulator?
If you’ve ever used Android Studio Emulator, BlueStacks, Genymotion, or similar software, you’ve probably noticed that they can be quite demanding on system resources.
Traditional emulators simulate an entire Android device, including the processor, hardware components, and operating system. While this approach works, it often results in higher CPU usage, longer startup times, and lower gaming performance.
Waydroid works differently.
Because it uses Linux containers, Android shares the same kernel as your Linux distribution. This significantly reduces overhead and makes Android applications feel much more responsive.
Some of the biggest advantages include:
- Faster boot times
- Better gaming performance
- Lower CPU usage
- Better battery life on laptops
- Native clipboard support
- Easy fullscreen support
- Excellent integration with Wayland
If your goal is simply running Android apps or games on Linux, Waydroid is usually a better choice than a traditional emulator.
Before You Start
Before installing Waydroid, make sure your system meets a few basic requirements.
You’ll need:
- Zorin OS 18 or newer
- Internet connection
- Around 10–15 GB of free storage
- Administrator (sudo) access
- Wayland desktop session
Although Waydroid can work on other Linux distributions, this guide specifically focuses on Zorin OS because that’s the system I personally tested.
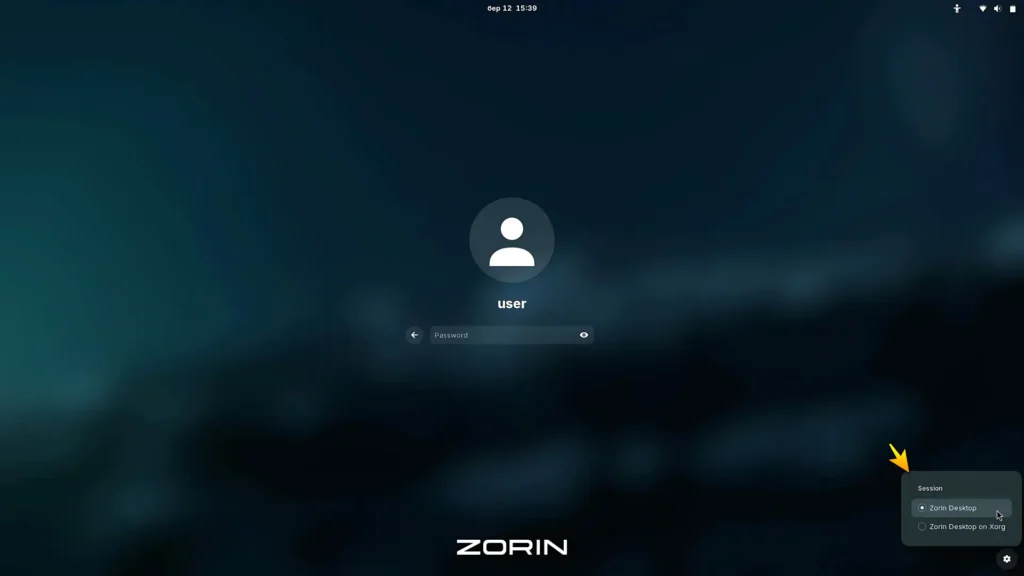
Step 1 – Switch to the Wayland Session
Before installing anything, we first need to make sure Zorin OS is running the Wayland desktop session.
Waydroid relies on Wayland for proper window integration. If you’re still using X11 (Xorg), Android applications may not launch correctly.
To switch:
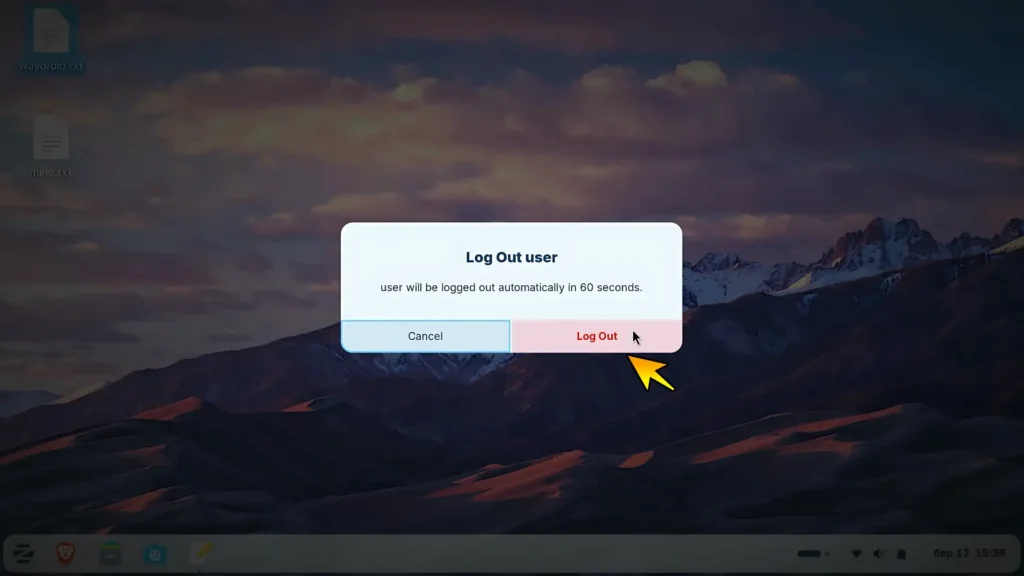
- Log out of your account.
- Click your username.
- Select the small gear icon in the bottom-right corner.
- Choose Zorin Desktop (the Wayland session).
- Sign back in.
If you’re already using Wayland, you can move directly to the next step.
Step 2 – Hide the Taskbar Automatically
This step isn’t required, but I highly recommend it.
When Android applications run in fullscreen mode, the Zorin taskbar can sometimes cover part of the interface.
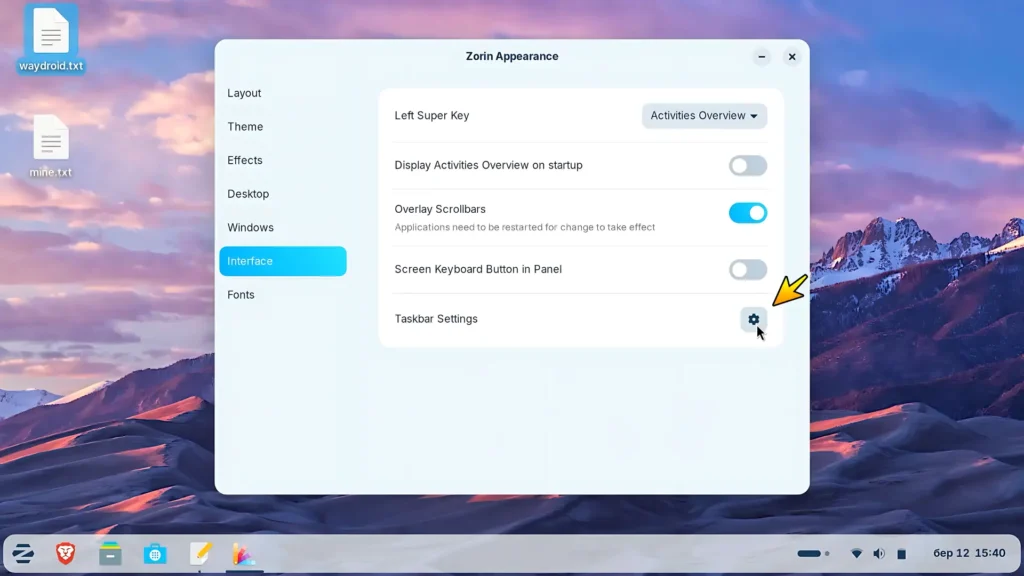
Fortunately, Zorin OS includes an Intelligent Hide option.
Open:
Zorin Appearance → Interface → Taskbar Settings → Panel Intellihide
Then select:
The panel hides from all windows
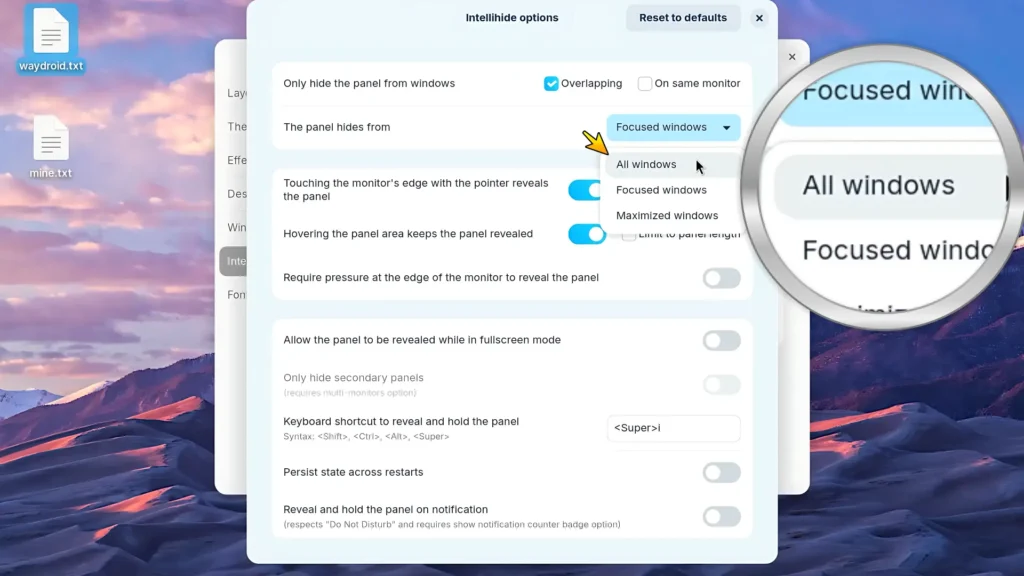
Now the taskbar automatically disappears whenever an application needs the full screen and returns when you move your mouse.
It creates a much cleaner Android experience.
Step 3 – Install Waydroid
Now it’s finally time to install Waydroid.
Open the Terminal by pressing:
Ctrl + Alt + T
If you’re new to Linux, here’s one useful tip.
Most websites tell you to paste commands with Ctrl + V, but that doesn’t work inside the terminal.
Instead, use:
Shift + Ctrl + V
This small shortcut saves a lot of frustration if you’re just getting started with Linux.
Update the System
First, update your package list and install a few required tools.
sudo apt update
sudo apt install curl ca-certificates -y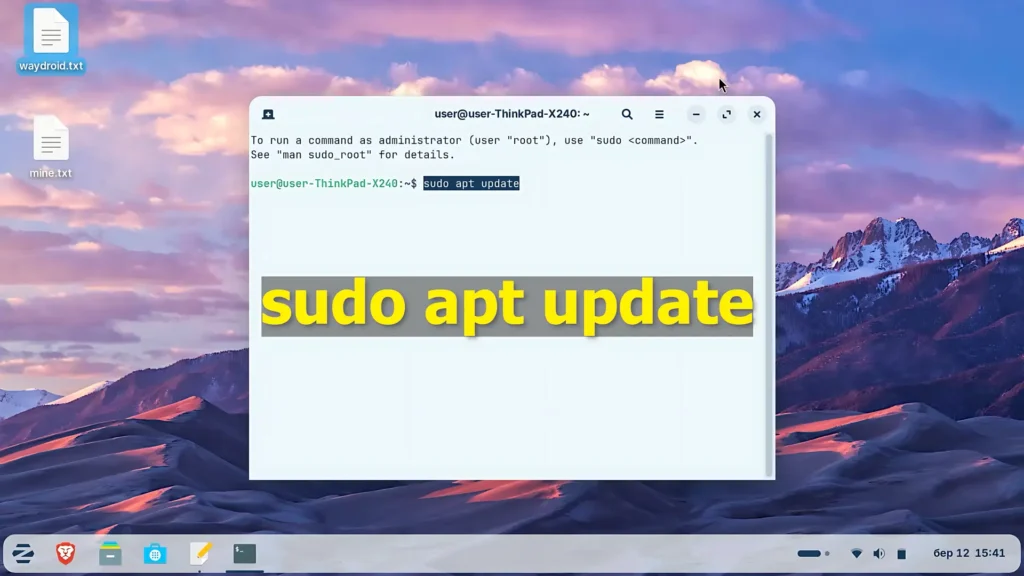
The first command refreshes your software repositories.
The second installs Curl and certificate packages, which are required for downloading the official Waydroid repository securely.
Add the Official Repository
Next, add the official Waydroid repository.
curl https://repo.waydro.id | sudo bashThis command automatically configures your system so Ubuntu-based distributions like Zorin OS can download Waydroid directly through the package manager.
After a few seconds, the repository will be ready.
Install Waydroid
Now install the application itself.
sudo apt install waydroid -yDepending on your internet speed, this may take a minute or two.
Once installation finishes, Waydroid is installed—but Android itself hasn’t been downloaded yet.
We’ll do that in the next section.
What’s Next?
At this point you’ve successfully installed the Waydroid software, but it doesn’t yet contain an Android operating system.
In the next part, we’ll:
- download the Android image with Google Play support,
- enable the Waydroid container,
- fix the Google Play certification error,
- register the GSF ID,
- restart the Play Store correctly,
- and prepare Waydroid for installing Android applications.
Step 4 – Download Android with Google Play Support
Installing Waydroid only adds the application itself. We still need to download the Android operating system that will run inside the container.
Fortunately, Waydroid allows us to choose between different Android images. For most users, I recommend installing the GAPPS version because it already includes Google Play Services and the Google Play Store.
Open the Terminal and run the following command:
sudo waydroid init -s GAPPS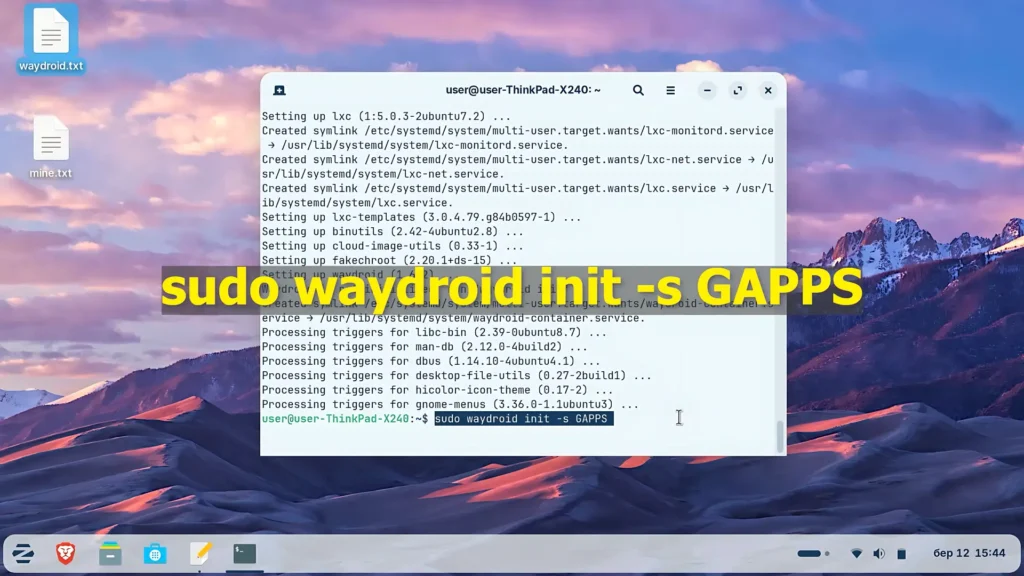
The download is approximately 1 GB, so depending on your internet connection, it may take several minutes to complete.
During my installation, everything completed successfully, although download speeds may occasionally be slow. If the process appears to freeze or fails unexpectedly, simply restart your computer and run the command again. In most cases, that resolves the issue.
Once Android has finished downloading, start the Waydroid container:
sudo systemctl start waydroid-container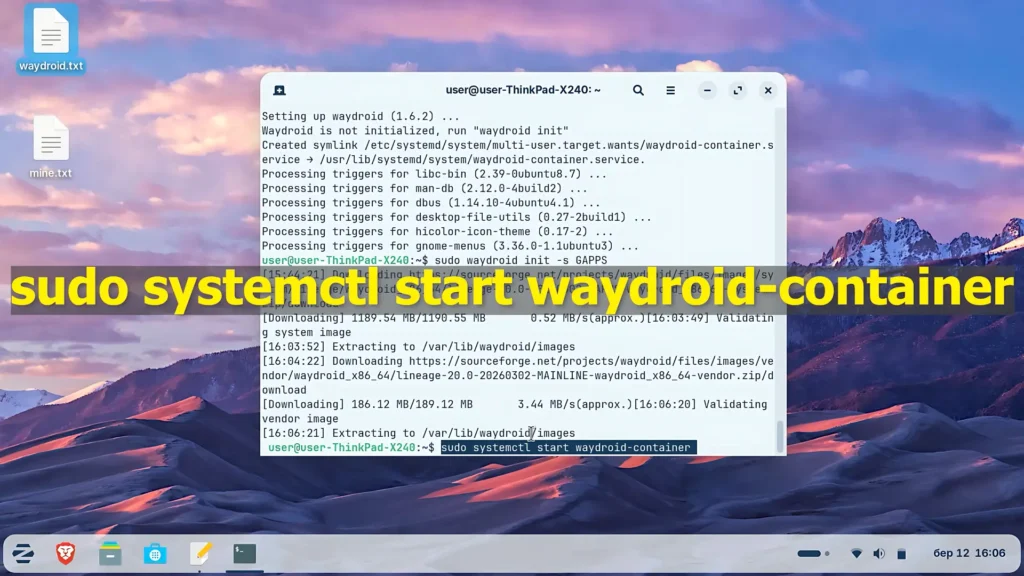
The container is responsible for running the Android environment in the background. Without it, Waydroid cannot launch.
You can now open Waydroid directly from the Zorin OS application menu.
The first launch usually takes a little longer than normal because Android is completing its initial setup.
Step 5 – Fix Google Play Certification
If you open Google Play Store immediately after installation, you’ll probably notice an error similar to:
Device isn’t Play Protect certified
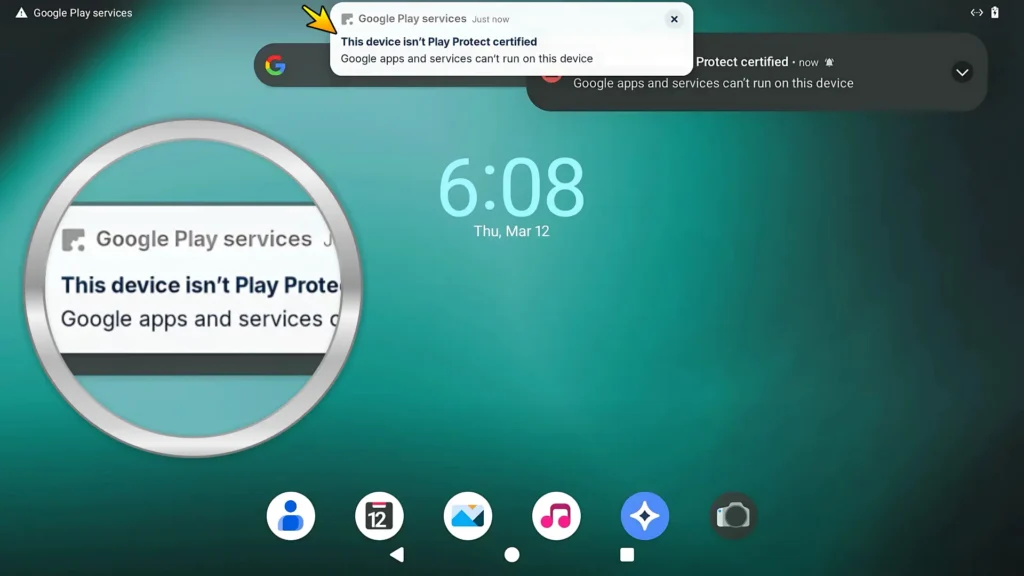
Don’t worry—this is completely normal.
Google doesn’t automatically recognize new Waydroid installations, so we simply need to register our Android ID.
Fortunately, the process only takes a few minutes.
Open the Android Shell
First, enter the Waydroid shell:
sudo waydroid shellThink of this as opening a terminal inside Android instead of Linux.
Now we need to retrieve the Android ID.
Run:
sqlite3 /data/data/com.google.android.gsf/databases/gservices.db "select * from main where name = \"android_id\";"After pressing Enter, you’ll see something similar to this:
android_id|1234567890123456789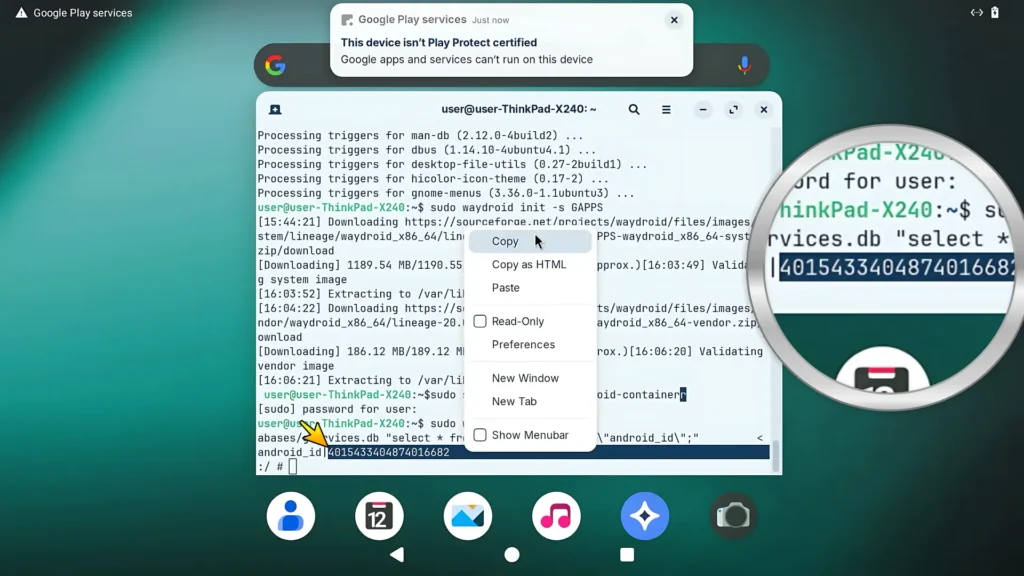
Only copy the long number.
You don’t need the text before it.
Register Your Device
Now open the following website in your browser:
https://google.com/android/uncertifiedSign in using the same Google account that you plan to use inside Waydroid.
Paste the Android ID you copied earlier and click Register.
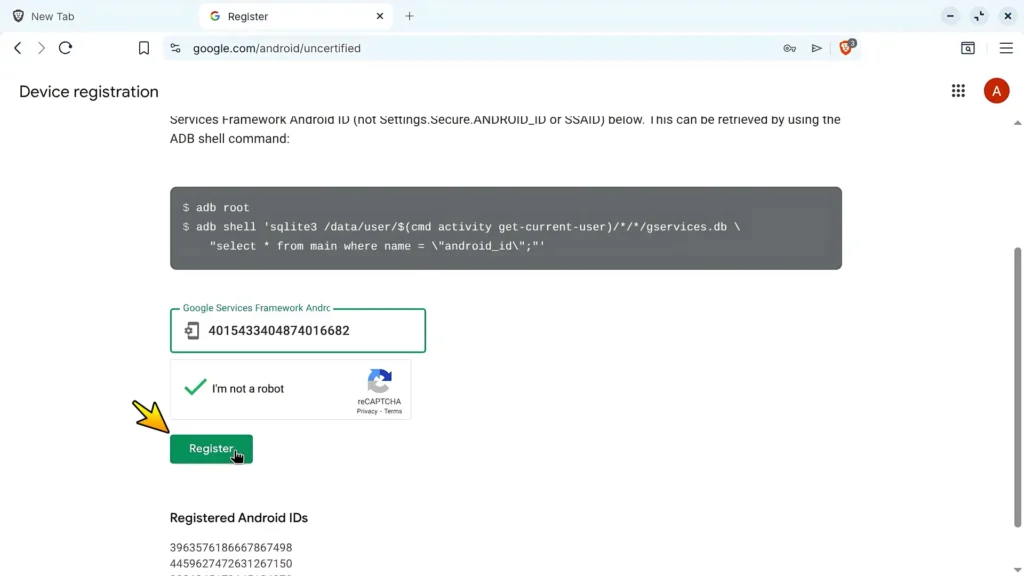
That’s all.
Google now recognizes your Waydroid installation as your device.
It may take a few minutes before the registration becomes active.
Clear Google Play Store Data
Sometimes Google Play continues showing the certification error even after registering the device.
Fortunately, there’s an easy fix.
Open the Waydroid shell again if necessary:
sudo waydroid shellNow clear the Play Store cache:
pm clear com.android.vendingNext, clear Google Play Services:
pm clear com.google.android.gmsThese commands simply reset the application’s stored data.
Nothing important will be deleted—you’ll only need to sign into Google again.
If you’re finished inside the Android shell, type:
exitto return to your normal Linux terminal.
Restart Waydroid
To apply all changes, restart the Waydroid session.
First stop the current session:
waydroid session stopThen restart the container:
sudo systemctl restart waydroid-containerAfter launching Waydroid again, the Play Store should work normally.
You can now sign in with your Google account and begin downloading Android applications.
Installing Your First Android Apps
At this point, everything is technically working.
However, you may notice another problem.
Some Android games simply don’t appear inside Google Play Store.
For example, during my testing, the game Oddmar wasn’t available for installation even though it should have been.
Fortunately, this isn’t a Play Store problem.
Instead, it’s related to CPU architecture.
Most Android games are compiled for ARM processors, while desktop computers typically use Intel or AMD x86 processors.
To solve this, we need to install an ARM translation layer.
This allows Android applications compiled for ARM devices to run correctly on desktop processors.
Fortunately, the installation is straightforward.
Step 6 – Install ARM Translation
This is probably the most important step if you plan to install Android games.
Without ARM translation, many applications either won’t appear in Google Play or won’t launch correctly.
The translation layer acts like an interpreter between your desktop processor and Android software.
First, install the required packages:
sudo apt install git python3-venv python3-pip -yNext, download the installation script:
cd ~/DownloadsClone the repository:
git clone https://github.com/casualsnek/waydroid_scriptMove into the project folder:
cd waydroid_scriptNow create a Python virtual environment:
python3 -m venv venvInstall all required dependencies:
./venv/bin/pip install -r requirements.txtAt this point, everything is ready.
The only remaining difference depends on which processor your computer uses.
Intel CPUs
If your computer has an Intel processor, run:
sudo ./venv/bin/python3 main.py install libhoudiniAMD CPUs
If you’re using an AMD processor like I am, run:
sudo ./venv/bin/python3 main.py install libndk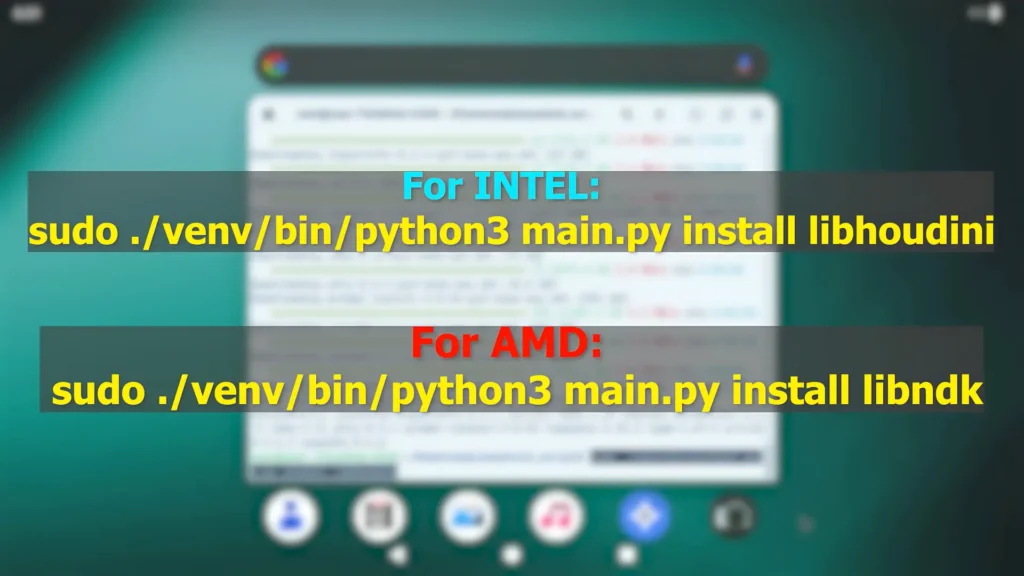
After the installation finishes, restart Waydroid.
Open Google Play Store again and search for the game that previously wasn’t available.
In my case, Oddmar immediately appeared and installed without any problems.
This single step dramatically improves compatibility with Android applications and games, making Waydroid much more useful for everyday use.
Step 7 – Disable the Virtual Keyboard
If you’re using Waydroid on a laptop or desktop computer, you probably won’t need Android’s on-screen keyboard. Since you’ll already have a physical keyboard connected, the virtual keyboard only takes up valuable screen space and can become annoying during everyday use.
Fortunately, disabling it only takes a few seconds.
Inside Waydroid, open:
Settings → System → Languages & Input → Physical Keyboard
Then disable:
Use on-screen keyboard
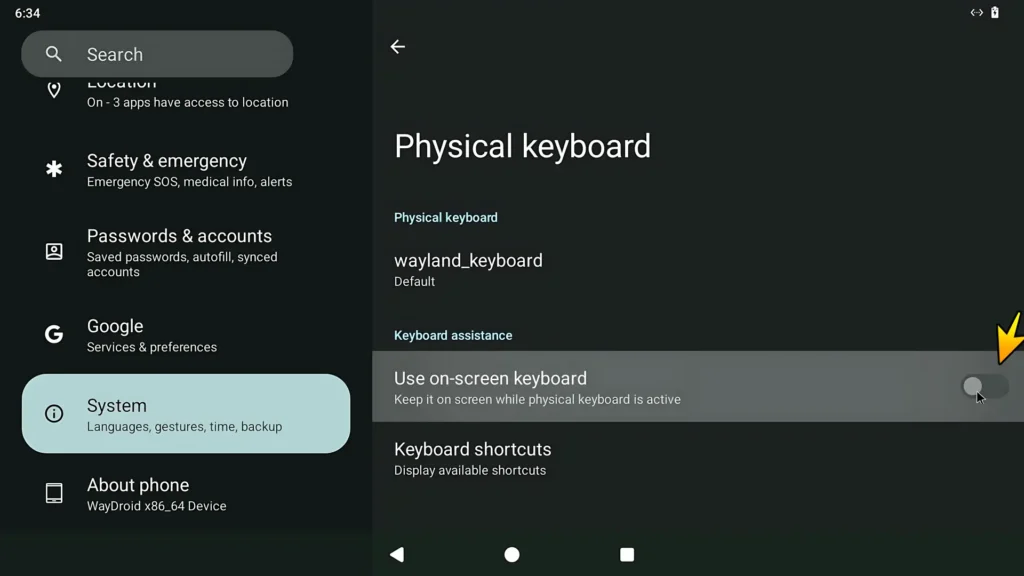
That’s it.
From now on, Android will automatically use your physical keyboard whenever you’re typing. This makes writing messages, searching the Play Store, browsing the web, and using productivity apps much more comfortable.
Although this is a small change, it’s one of those quality-of-life improvements that makes Waydroid feel much more like a native desktop application.
Step 8 – Fix Internet Connection
One of the most common issues after installing Waydroid is that Android launches successfully, but there’s no internet connection.
Usually, the problem isn’t Waydroid itself.
Instead, your Linux firewall blocks network traffic between the Android container and your operating system.
If this happens, open the Terminal and run:
sudo ufw disableAfter disabling the firewall, restart Waydroid and check whether the connection is working.
If Google Play Store loads normally and websites open inside Android, the problem has been solved.
Note: Disabling the firewall is the simplest solution and works well for most home users. If you rely on UFW for security, consider reading the official Waydroid documentation to configure firewall rules instead of disabling it permanently.
Step 9 – Enable Gamepad Support
One feature I really wanted to test was controller support.
Many Android games are far more enjoyable with a gamepad than with keyboard controls or touch input, and fortunately Waydroid supports external controllers.
However, it needs a small configuration first.
Make sure Waydroid is already running.
Then execute these commands:
waydroid prop set persist.waydroid.udev true
waydroid prop set persist.waydroid.uevent true
These properties allow Waydroid to detect connected USB and Bluetooth controllers more reliably.
Next, stop the current session:
waydroid session stopFinally, restart your computer.
Although restarting might seem unnecessary, it ensures both your mouse and gamepad are detected correctly after the new settings are applied.
During my testing, I connected both a wired controller and a wireless controller without any issues.
Both were recognized successfully, and gameplay felt smooth.
If you don’t own a controller, don’t worry.
Many Android games also support keyboard controls, making Waydroid perfectly usable on a regular laptop.
My Experience Using Waydroid on Zorin OS
After completing the installation, I spent some time testing different Android applications and games to see how Waydroid performs in real-world use.
Overall, I was pleasantly surprised.
Applications opened quickly, scrolling felt smooth, and the interface responded almost instantly.
Unlike many Android emulators, Waydroid didn’t feel heavy or sluggish.
The experience felt much closer to using a real Android tablet than running a virtual machine.
Google Play Store worked normally after completing the certification process, allowing me to install applications just as I would on a smartphone.
Gaming Performance
Gaming was one of the areas I was most curious about.
After installing the ARM translation layer, many previously unavailable games immediately appeared in Google Play Store.
One example was Oddmar, which wasn’t visible before installing ARM translation.
Once the translation layer was installed, the game downloaded normally and launched without any additional configuration.
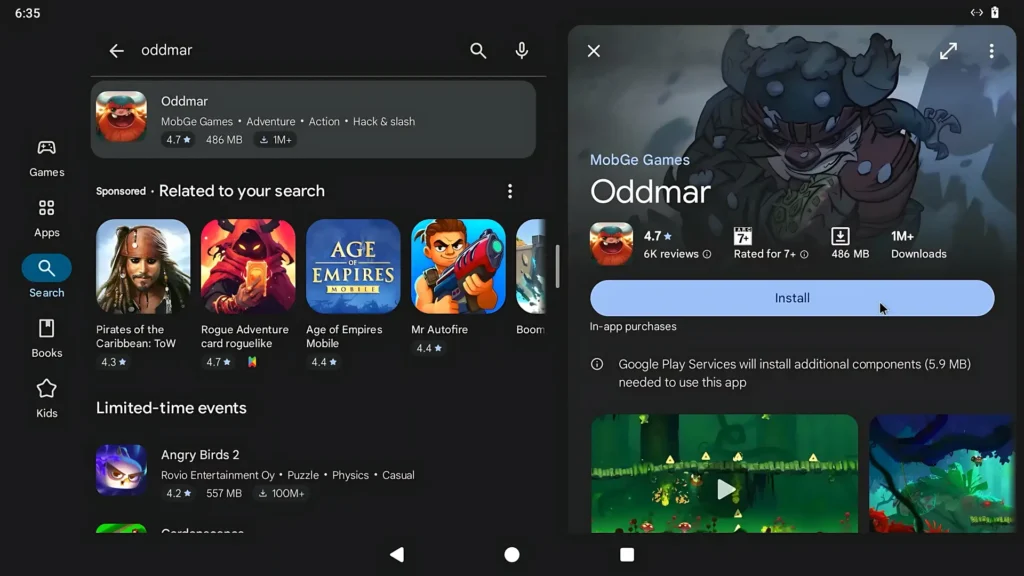
Performance naturally depends on your hardware, but on my older laptop the results were better than I expected.
The gameplay felt smooth enough to enjoy, loading times were reasonable, and controller support worked correctly after enabling the required properties.
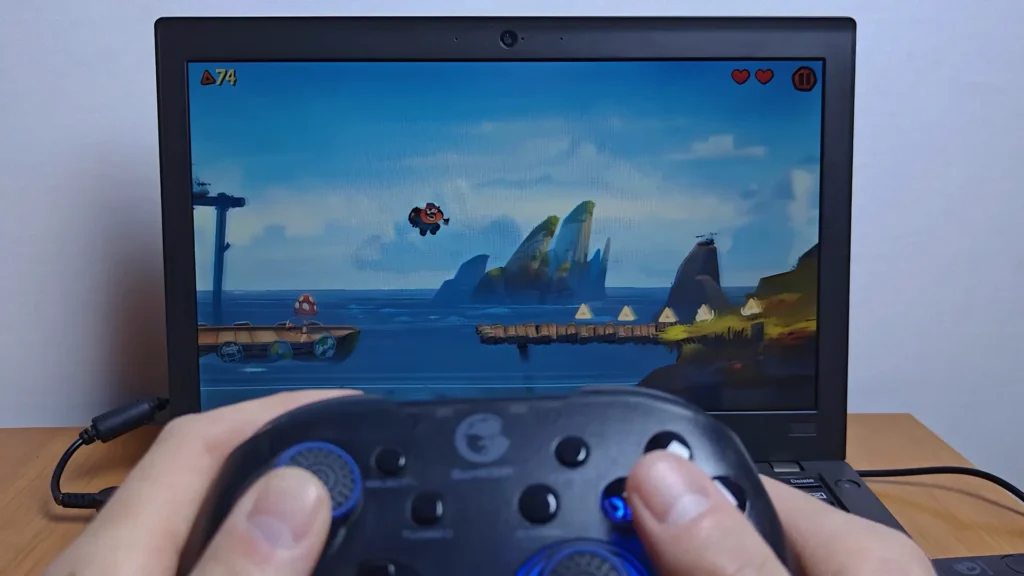
If your computer already runs Zorin OS comfortably, there’s a good chance it can also handle many Android applications without major problems.
Why I Prefer Waydroid Over Android Emulators
After testing both traditional Android emulators and Waydroid, several differences became obvious.
The first is startup speed.
Waydroid launches much faster because it doesn’t need to emulate an entire Android device.
The second advantage is responsiveness.
Applications feel more natural, animations are smoother, and the overall experience is closer to running native software.
Resource usage is another important factor.
Traditional emulators often consume several gigabytes of RAM before you’ve even opened an application.
Waydroid is considerably lighter, making it especially attractive for older computers.
Finally, integration with Linux is significantly better.
Copy and paste work as expected, windows behave like regular desktop applications, and fullscreen mode feels much more polished.
For anyone who simply wants Android apps on Linux, I believe Waydroid is currently one of the best available solutions.
Tips for the Best Experience
After spending time with Waydroid, here are a few recommendations that can make your experience even better.
- Always use the Wayland session instead of X11.
- Keep Zorin OS fully updated.
- Install the GAPPS image unless you specifically want a Google-free Android environment.
- Install the ARM translation layer if you plan to play games.
- Hide the Zorin taskbar for better fullscreen support.
- Restart the Waydroid container whenever you change major settings.
- Keep enough free disk space because Android applications can quickly consume storage.
Following these recommendations will help you avoid many common issues before they even appear.
Two Things Worth Knowing
Although my overall experience with Waydroid has been very positive, I noticed two small issues during testing.
The first is that Waydroid may occasionally reopen by itself after closing the application.
This doesn’t happen very often, but it can be a little surprising the first time you see it.
Fortunately, it doesn’t affect functionality and is mostly a minor inconvenience.
The second issue involves audio.
If a game launches without sound, don’t panic.
In my case, the solution was incredibly simple.
Open the Android sound settings inside Waydroid and increase the media volume.
After doing that, the sound started working immediately.
Neither of these issues is serious, but they’re worth mentioning because many users might think something is broken when the fixes are actually very straightforward.
Common Waydroid Problems and Solutions
Although the installation process is straightforward, there are a few issues that many users encounter. Fortunately, most of them can be solved in just a few minutes.
Google Play Store Says “Device Isn’t Certified”
This is probably the most common issue after installing Waydroid.
The solution is simple:
- Retrieve your Android ID.
- Register it on Google’s uncertified devices page.
- Clear the Play Store data.
- Restart the Waydroid container.
If you’ve followed the steps in this guide, Google Play should begin working normally after a short time.
Android Apps Don’t Appear in Google Play
If certain games or applications are missing, the problem is usually not Google Play itself.
Most Android games are designed for ARM processors, while desktop computers use Intel or AMD x86 processors.
Installing the ARM translation layer (libhoudini for Intel or libndk for AMD) solves this problem for many applications.
After installing the translator, restart Waydroid and search again.
In my testing, games like Oddmar appeared immediately after completing this step.
No Internet Connection
If Android launches successfully but cannot connect to the internet, your firewall may be blocking network communication.
Try disabling UFW temporarily:
sudo ufw disableRestart Waydroid and test the connection again.
If everything works, you’ll know the firewall was responsible.
No Sound Inside Games
If a game starts but you can’t hear any audio, check the Android sound settings.
Open:
Settings → Sound
Increase the media volume.
During my testing, this fixed the problem immediately.
Waydroid Opens Again After Closing
This is a small bug that occasionally appears.
Sometimes Waydroid automatically launches again after being closed.
Fortunately, this doesn’t affect performance or stability and usually happens only occasionally.
Gamepad Isn’t Detected
Make sure you enabled gamepad support using:
waydroid prop set persist.waydroid.udev true
waydroid prop set persist.waydroid.uevent true
Then stop the session and restart your computer.
Most wired and wireless controllers should now work correctly.
Applications Feel Slow
Although Waydroid is much lighter than a traditional emulator, Android applications still depend on your hardware.
For the best experience:
- Use an SSD.
- Keep enough free RAM available.
- Close unnecessary background applications.
- Keep Waydroid and Zorin OS updated.
How to Uninstall Waydroid
If you ever decide that you no longer need Waydroid, removing it is very simple.
First remove the package:
sudo apt remove waydroid -y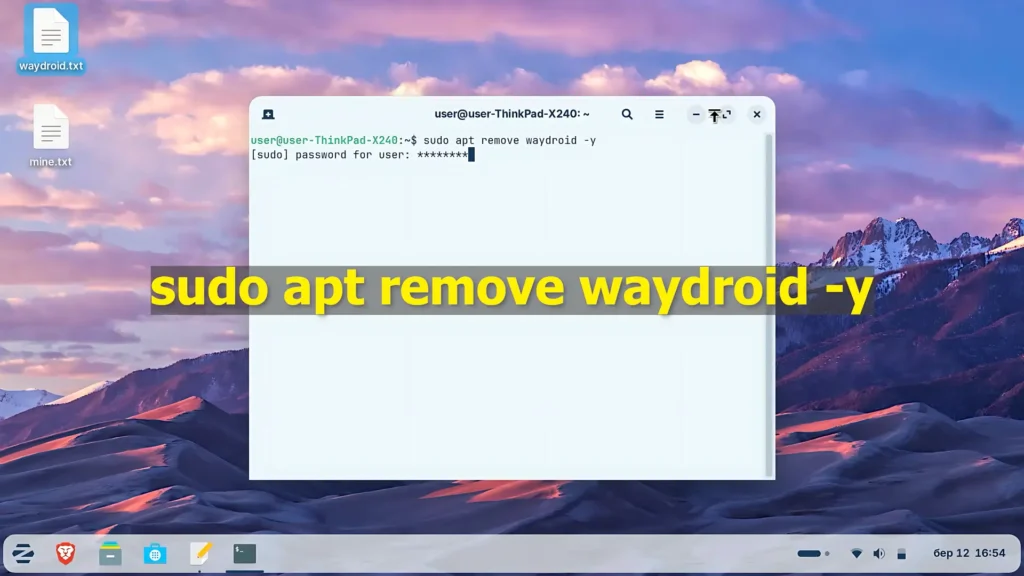
Then delete all remaining files:
sudo rm -rf /var/lib/waydroid /home/.waydroid ~/waydroid ~/.share/waydroid ~/.local/share/applications/*waydroid*After running these commands, Waydroid and its data will be removed from your system.
Frequently Asked Questions
Is Waydroid free?
Yes. Waydroid is completely free and open source.
Does Waydroid work on Zorin OS?
Yes. In fact, Zorin OS is one of the easiest Linux distributions for installing Waydroid because it’s based on Ubuntu.
Does Waydroid support Google Play Store?
Yes.
Simply initialize Waydroid using the GAPPS image and complete the Play Protect certification process described in this guide.
Does Waydroid work on AMD processors?
Yes.
You’ll simply install libndk instead of libhoudini during the ARM translation step.
Does Waydroid work on Intel processors?
Absolutely.
Intel users should install libhoudini.
Can I play Android games?
Yes.
Many Android games work surprisingly well, especially after installing the ARM translation layer.
Performance depends on your hardware, but many popular titles are fully playable.
Is Waydroid better than BlueStacks?
If you’re using Linux, I believe the answer is yes.
Waydroid generally offers better integration with Linux, lower resource usage, and a more native experience because it doesn’t emulate the entire Android operating system.
Does Waydroid require virtualization?
No.
Unlike many Android emulators, Waydroid uses Linux containers rather than full virtualization.
This is one of the reasons it’s significantly faster.
Does Waydroid work offline?
Yes.
Once applications are installed, many of them can run without an internet connection.
However, Google Play Store obviously requires internet access for downloading and updating apps.
Can I uninstall Waydroid later?
Yes.
Simply remove the package and delete the remaining data using the commands shown earlier in this guide.
Final Thoughts
Waydroid is one of the most impressive Linux projects I’ve tested in recent years.
What initially looks like a long list of terminal commands turns out to be a surprisingly straightforward installation process when you take it one step at a time.
Once everything is configured, Zorin OS becomes much more than just a Windows alternative. You gain access to Android applications, mobile games, and Google Play Store without relying on heavy virtual machines or resource-hungry emulators.
During my own testing, the overall experience exceeded my expectations. Applications launched quickly, Google Play worked reliably after certification, controller support functioned correctly, and Android games performed far better than I expected on older hardware.
Of course, Waydroid isn’t perfect. You may occasionally encounter small issues such as Play Store certification, missing ARM applications, or minor audio glitches. Fortunately, every problem I encountered had a simple solution, and once configured correctly, the system remained stable.
If you’ve been looking for the easiest way to run Android apps on Linux, I believe Waydroid is currently one of the best solutions available.
I hope this guide helped you complete the installation successfully. If it did, consider exploring some of my other Linux tutorials, where I cover operating systems, hardware upgrades, and practical tips for getting the most out of both old and modern computers.
Happy experimenting!