Buying a new monitor is always exciting. Whether you upgraded from an old 60Hz display, moved to a high refresh rate gaming monitor, or finally switched to a larger 1440p or 4K panel, the difference can feel massive right away.
However, many users make the same mistake after connecting a new monitor:
they simply plug it in and start using it without checking the settings.
In reality, Windows does not always configure everything correctly automatically. There are still situations where:
- the monitor runs at 60Hz instead of 144Hz or 165Hz;
- HDR looks washed out;
- G-Sync or FreeSync is disabled;
- the wrong cable limits refresh rate;
- colors look inaccurate;
- scaling makes text blurry.
This guide covers the most important things you should check after buying a new monitor, especially if you use Windows 11 for gaming, productivity, content creation, or everyday usage.
Choose the Right Cable First
One of the first mistakes users make is using the wrong cable.
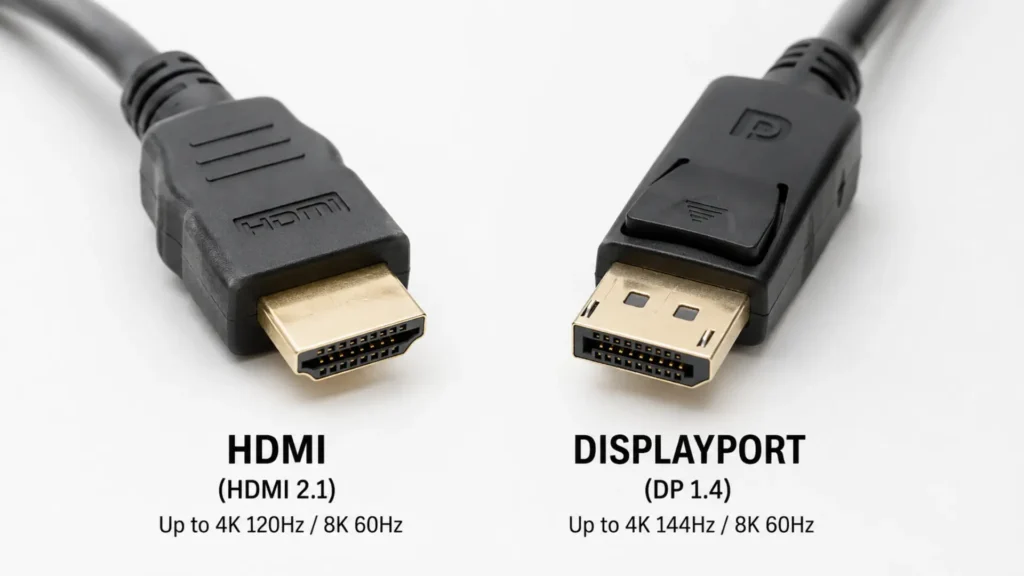
Many monitors include HDMI cables in the box, and while HDMI is perfectly fine in many situations, DisplayPort is often the better option for PC gaming and high refresh rate monitors.
Why DisplayPort Is Usually Better for PC Users
DisplayPort commonly provides:
- higher refresh rate support;
- better compatibility with PC GPUs;
- improved adaptive sync support;
- easier multi-monitor support;
- better compatibility with high refresh rate gaming setups.
For example:
| Connection | Typical Usage |
|---|---|
| HDMI 2.0 | 1440p 144Hz or 4K 60Hz |
| HDMI 2.1 | 4K 120Hz and newer gaming displays |
| DisplayPort 1.4 | High refresh rate 1440p and 4K gaming |
| DisplayPort 2.x | Modern high bandwidth displays |
If your monitor and GPU both support DisplayPort, it is usually the safest choice for gaming-focused setups.
HDMI Is Still Good — But Versions Matter
A lot of users assume all HDMI cables and ports are identical.
They are not.
For example:
- HDMI 1.4 is very outdated;
- HDMI 2.0 is still common;
- HDMI 2.1 is required for many modern high refresh rate 4K setups.
Some monitors advertise high refresh rates, but only through DisplayPort.
This is especially common with older gaming monitors.
Before buying or connecting a monitor, always check:
- monitor specifications;
- GPU outputs;
- cable version;
- maximum supported refresh rate.
Cheap Cables Can Cause Problems
This is something many users overlook.
Low-quality HDMI or DisplayPort cables can sometimes cause:
- random black screens;
- signal drops;
- flickering;
- limited refresh rate options;
- unstable VRR behavior.
This becomes more common at:
- 144Hz;
- 165Hz;
- 240Hz;
- ultrawide resolutions;
- 4K high refresh rate.
You do not necessarily need an expensive cable, but extremely cheap unknown-brand cables can sometimes create issues.
Set the Correct Refresh Rate in Windows
This is probably the most common mistake people make after buying a new monitor.
You buy a 144Hz or 165Hz monitor…
and Windows still runs it at 60Hz.
Believe it or not, this still happens very often.
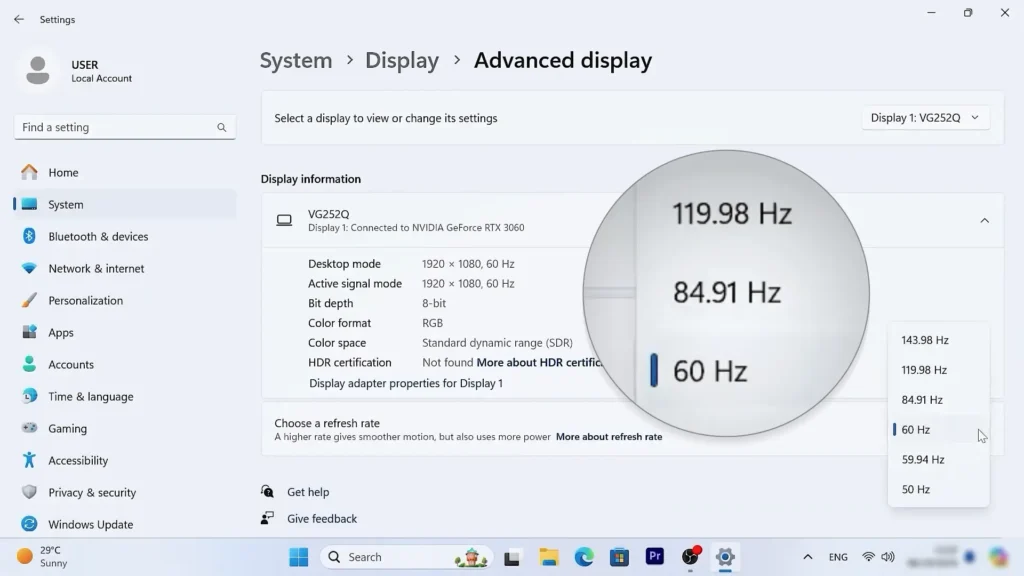
How to Check Refresh Rate in Windows 11
Go to:
Settings → System → Display → Advanced DisplayThen look for:
Choose a refresh rateAnd select the highest refresh rate supported by your monitor.
Examples:
- 120Hz
- 144Hz
- 165Hz
- 240Hz
The difference between 60Hz and high refresh rate monitors is enormous for:
- gaming;
- desktop smoothness;
- scrolling;
- animations;
- mouse movement.
Even basic web browsing feels significantly smoother.
If you’re also running Windows 11 on older or unsupported hardware, proper monitor configuration becomes even more important for gaming smoothness, HDR behavior, and desktop responsiveness. I also covered my long-term experience with unsupported Windows 11 setups in a separate article.
Why the Correct Refresh Rate Sometimes Does Not Appear
If Windows only shows 60Hz, there are several possible reasons:
1. Wrong Cable
The cable may not support the monitor’s maximum bandwidth.
2. Wrong Port
Some monitors only support maximum refresh rate on specific ports.
Example:
- HDMI limited to 120Hz;
- DisplayPort supports 165Hz.
3. GPU Limitations
Older GPUs may not support modern display standards properly.
4. Monitor Settings
Some monitors require enabling:
- overclock mode;
- gaming mode;
- high refresh mode.
inside the monitor’s OSD menu.
Enable G-Sync or AMD FreeSync
If your monitor supports adaptive sync technologies, you should usually enable them for gaming.
These technologies help reduce:
- screen tearing;
- stuttering;
- inconsistent frame pacing.
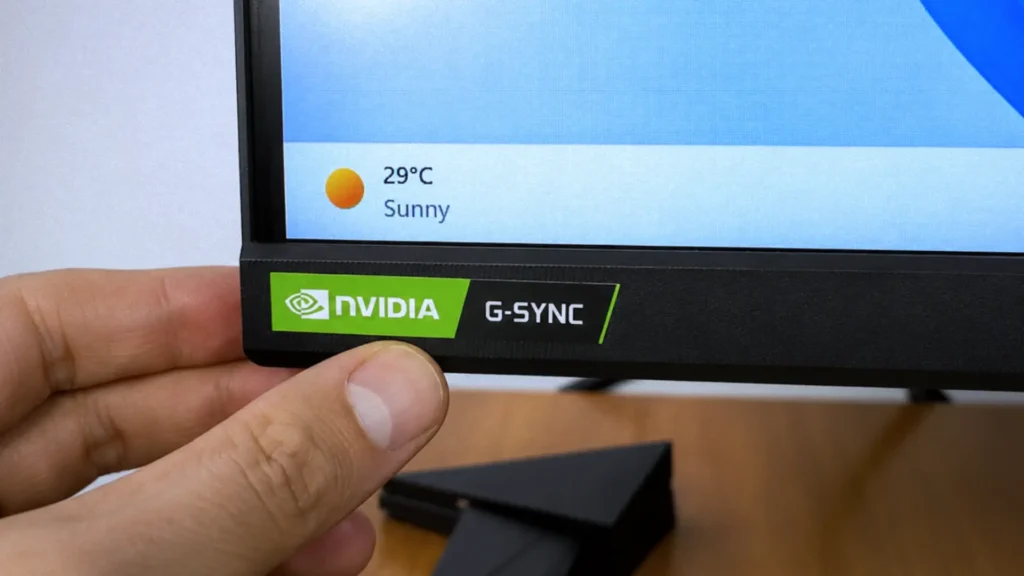
NVIDIA Users
You can enable:
G-Syncthrough NVIDIA Control Panel.
AMD Users
You can enable:
AMD FreeSyncthrough AMD Software Adrenalin Edition.
Should You Always Use G-Sync or FreeSync?
Not necessarily.
In games:
✅ usually yes.
In some desktop applications:
❌ sometimes no.
For example, some users occasionally experience:
- flickering;
- brightness instability;
- VRR gamma issues.
This can happen in:
- browsers;
- video editing software;
- Adobe Premiere Pro;
- dark scenes in games.
This depends heavily on:
- monitor quality;
- VRR implementation;
- panel type;
- firmware quality.
OLED and VRR Flickering
This became a bigger topic in recent years.
Some OLED monitors can show visible brightness fluctuations when VRR is enabled, especially in dark content.
This is not always a defect.
Sometimes it is simply a limitation of current OLED VRR behavior.
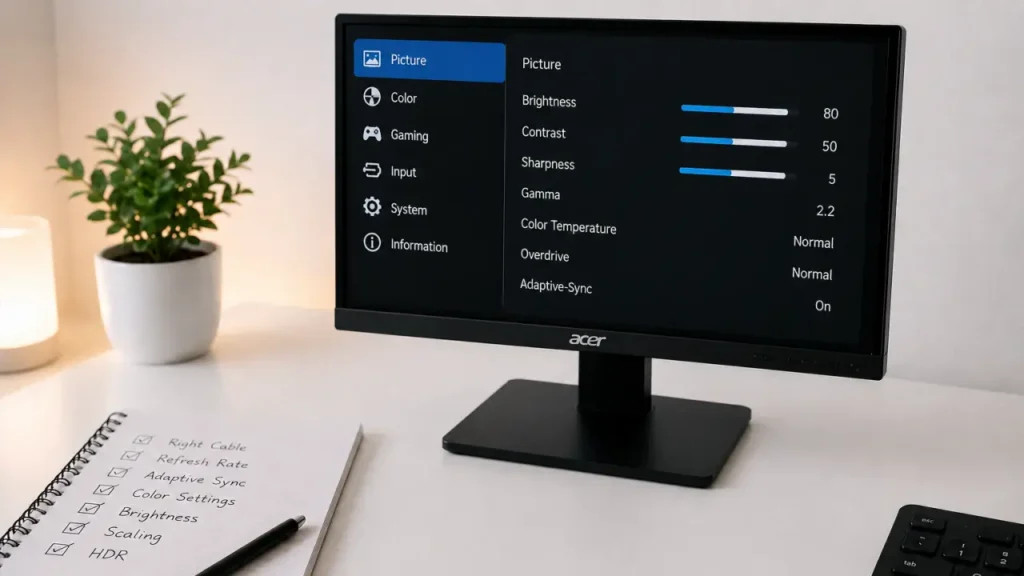
Adjust Brightness and Colors Properly
Factory monitor settings are often not ideal.
Many monitors ship with:
- overly bright settings;
- oversaturated colors;
- aggressive sharpness;
- cool blue tones.
This can cause:
- eye strain;
- unnatural colors;
- poor nighttime usage.
Best Starting Point for Most Users
For general usage:
Color Profile
Standard / sRGBBrightness
Usually:
20–50%depending on room lighting.
Many users unknowingly run monitors at maximum brightness permanently.
This is often unnecessary.
Warm vs Cool Color Profiles
Most monitors include several presets:
- Cool
- Warm
- Standard
- FPS
- Movie
- Reading
My Recommendation
For most users:
✅ Standard
or
✅ Warm
usually looks more natural than aggressive cool blue tones.
Why sRGB Mode Is Important
If your monitor supports wide color gamut, colors may look oversaturated in normal mode.
sRGB mode often provides:
- more accurate web colors;
- better photo consistency;
- more natural desktop usage.
This is especially useful for:
- creators;
- photo editing;
- YouTube thumbnails;
- website design.
Check Windows HDR Settings Carefully
HDR support improved in Windows 11 over the years, but it still is not perfect.
Some monitors look amazing with HDR.
Others look terrible.
Common HDR Problems
Users often report:
- washed out colors;
- gray blacks;
- dull desktop appearance;
- inconsistent brightness.
When HDR Is Worth Using
HDR usually works best for:
- HDR games;
- HDR movies;
- streaming platforms;
- OLED monitors;
- mini-LED monitors.
When HDR May Not Be Worth It
On cheaper HDR monitors:
sometimes SDR actually looks better.
Especially on displays with:
- low brightness;
- poor local dimming;
- fake HDR certifications.
Windows Auto HDR
Windows 11 also includes:
Auto HDRwhich attempts to add HDR-like effects to SDR games.
Results vary significantly depending on the game.
Some games benefit from it.
Others look strange or oversaturated.
Check Windows Scaling Settings
This is another important step many users ignore.
Higher resolution monitors often require scaling adjustments.
Especially:
- 1440p laptops;
- 4K monitors;
- ultrawide displays.
Recommended Scaling Values
| Resolution | Typical Scaling |
|---|---|
| 1080p | 100% |
| 1440p | 100–125% |
| 4K | 125–150% |
Blurry Text Issues
Sometimes apps look blurry because they are not scaling correctly.
This still happens in some older applications.
You can sometimes improve this through:
Compatibility → High DPI Settingsinside application properties.
Monitor Overdrive and Response Time
Gaming monitors often include:
- Response Time;
- Overdrive;
- Motion Blur Reduction.
settings.
Stronger Overdrive Is Not Always Better
Many users assume:
Fastest = BestBut aggressive overdrive can create:
- inverse ghosting;
- overshoot artifacts;
- strange motion trails.
Best Recommendation
Usually:
✅ Normal
or
✅ Fast
provides the best balance.
Maximum settings often look worse.
IPS vs VA vs OLED Differences
Different panel types behave differently.
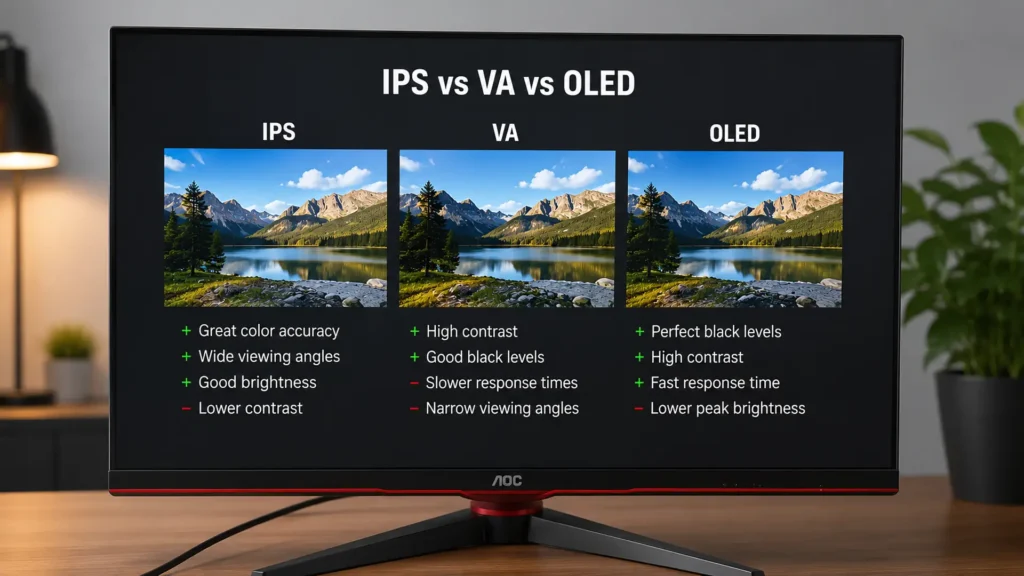
IPS
Pros:
- good colors;
- good viewing angles;
- balanced experience.
Cons:
- IPS glow;
- weaker blacks.
VA
Pros:
- better contrast;
- deeper blacks.
Cons:
- slower dark transitions;
- possible smearing.
OLED
Pros:
- incredible contrast;
- instant response times;
- amazing HDR.
Cons:
- burn-in risk;
- VRR flickering in some cases;
- expensive.
Check Monitor Firmware Updates
Some modern monitors support firmware updates.
This can improve:
- VRR behavior;
- HDR performance;
- compatibility;
- stability.
Not all monitors support this, but some gaming monitors do.
Multi-Monitor Setup Tips
If you use multiple monitors:
- try matching refresh rates when possible;
- avoid extremely different brightness levels;
- keep scaling consistent.
Mixed setups sometimes create:
- cursor stutter;
- inconsistent smoothness;
- application scaling problems.
Laptop Users: Important Reminder
If you connect a monitor to a laptop:
make sure the port is connected directly to the dedicated GPU when possible.
On some gaming laptops:
- HDMI may connect to integrated graphics;
- USB-C DisplayPort may connect directly to the NVIDIA GPU.
This can affect:
- gaming performance;
- VRR support;
- latency.
Clean Your Monitor Properly
Do not use random cleaning chemicals.
Use:
- microfiber cloth;
- distilled water if necessary.
Avoid:
- paper towels;
- aggressive cleaners;
- alcohol-heavy products.
especially on OLED displays.
Common Mistakes After Buying a New Monitor
Here are the most common mistakes users still make:
- leaving monitor at 60Hz;
- using bad HDMI cables;
- enabling terrible overdrive settings;
- maxing brightness permanently;
- using fake HDR modes;
- ignoring scaling settings;
- forgetting adaptive sync;
- using oversaturated color modes.
Final Thoughts
Buying a new monitor is only the first step.
To get the best experience, you should always check:
- refresh rate;
- cable quality;
- adaptive sync;
- brightness;
- color settings;
- HDR behavior;
- scaling;
- response time settings.
Even expensive monitors can feel disappointing if configured incorrectly.
At the same time, properly configured mid-range monitors can provide an excellent experience for gaming, productivity, content creation, and everyday usage.
And honestly, once you switch from an old 60Hz display to a properly configured high refresh rate monitor, it is very difficult to go back.