Operating Systems, Windows
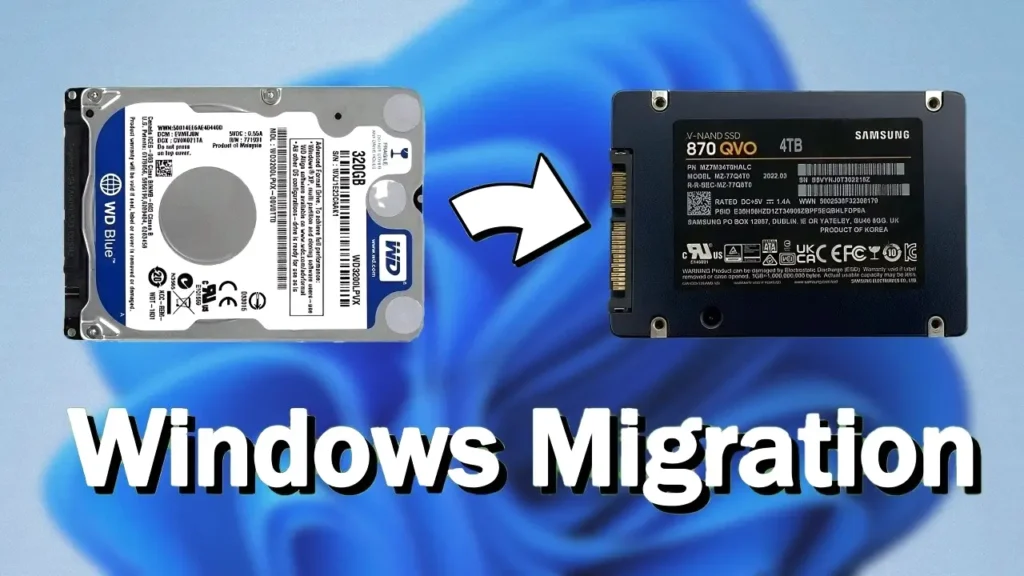
If your laptop or desktop still uses a traditional hard disk drive (HDD), upgrading to a solid-state drive (SSD) is one of the best improvements you can make. In many cases, an SSD can make an older computer feel significantly faster without replacing the processor or adding more memory.
The best part is that you do not need to reinstall Windows, reinstall drivers, or manually transfer your files. By cloning your existing drive, you can move your operating system, applications, settings, and personal files to a new SSD while keeping everything exactly as it was before.
In this guide, I will show you how to upgrade HDD to SSD without reinstalling Windows using a free utility. This method works on Windows 7, Windows 8.1, Windows 10, and Windows 11.
Why Upgrade from HDD to SSD?
For many users, an SSD upgrade provides the most noticeable performance improvement they can make to an older computer.
Traditional hard drives use spinning platters and moving mechanical components to read and write data. While they offer large storage capacities at a low cost, they are significantly slower than modern SSDs.
An SSD has no moving parts and can access files much faster. As a result, everyday tasks feel smoother and more responsive.
After upgrading from an HDD to an SSD, you may notice:
- Faster startup times
- Quicker application launches
- Improved multitasking performance
- Faster file transfers
- Reduced loading times
- Lower power consumption
- Less noise and vibration
- Better overall responsiveness
Even a budget SATA SSD can completely transform an older laptop.
HDD vs SSD Comparison
| Feature | HDD | SSD |
|---|---|---|
| Speed | Slow | Fast |
| Boot Time | Longer | Much Faster |
| Noise | Audible | Silent |
| Power Consumption | Higher | Lower |
| Durability | Lower | Higher |
| Moving Parts | Yes | No |
| Heat Generation | More | Less |
| System Responsiveness | Moderate | Excellent |
While HDDs are still useful for mass storage, SSDs provide a much better experience for running Windows and everyday applications.
Is Upgrading an Old Laptop Worth It?
Absolutely.
Over the years, I have upgraded several older laptops from HDDs to SSDs, and the difference is often dramatic.
A system that takes several minutes to boot can suddenly become ready in seconds. Applications open faster, Windows updates install more smoothly, and multitasking becomes noticeably more comfortable.
Many people assume they need a new laptop when their current machine feels slow. In reality, the hard drive is often the biggest bottleneck.
If your laptop still uses a mechanical drive, replacing it with an SSD is one of the most cost-effective upgrades available.
Clone Windows or Reinstall Windows?
Before starting, it is important to understand the difference between cloning and performing a clean installation.
Cloning Windows
Cloning copies your existing installation to another drive.
This includes:
- Windows
- Drivers
- Applications
- Documents
- Photos
- User accounts
- Browser settings
After cloning, everything should look exactly the same as before.
Clean Installation
A clean installation requires:
- Installing Windows from scratch
- Reinstalling drivers
- Reinstalling applications
- Restoring personal files
- Reconfiguring settings
While a clean installation has some advantages, cloning is usually much faster and more convenient.
What You Need
Before starting the upgrade process, prepare the following:
Hardware
- Existing HDD containing Windows
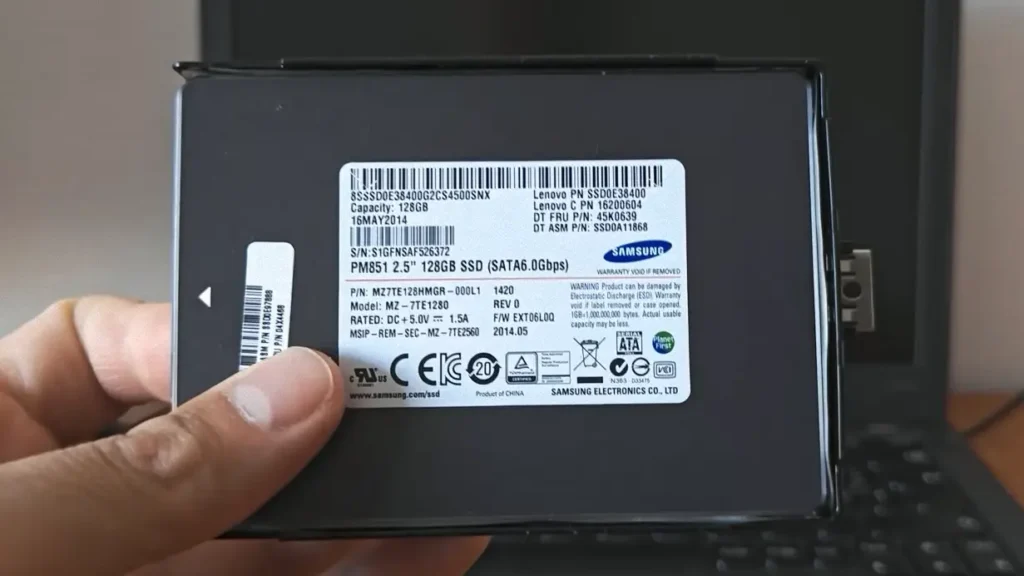
- New SSD
- SATA-to-USB adapter
- Laptop or desktop computer
Software
Recommended
- External backup drive
- USB flash drive
- Screwdriver set
- Laptop service manual
Important Things Before You Start
Before migrating Windows to a new SSD, there are a few important things you should know.
Back Up Important Files
Although drive cloning is generally safe, there is always a small risk of unexpected issues.
Before making any changes, create a backup of important files.
The SSD Will Be Erased
The migration process will overwrite existing partitions on the target SSD.
If your SSD already contains files, back them up before proceeding.
Make Sure the SSD Has Enough Space
The SSD must have enough capacity to hold all data currently stored on the HDD.
For example:
- HDD used space: 180 GB
- SSD size: 120 GB
This migration will not work because the SSD does not have sufficient space.
Check the amount of used storage before beginning.
Disable BitLocker if Necessary
Some Windows systems use BitLocker encryption.
If BitLocker is enabled, temporarily disable it before cloning the drive.
This can help avoid compatibility issues during migration.
Step 1: Download and Install DiskGenius
Open your preferred web browser and visit the DiskGenius official website.
Download the free version and install it.
The installation process is straightforward and only takes a few minutes.
Once completed, launch the application.
Step 2: Connect the SSD to Your Computer
Before you can transfer Windows, the SSD must be connected to the computer.
The easiest method is to use a SATA-to-USB adapter.
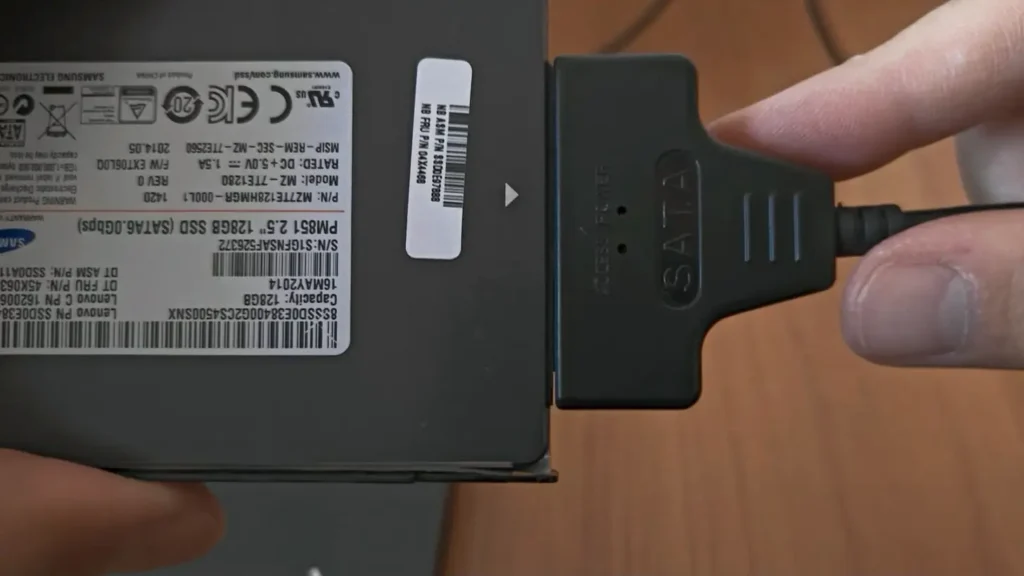
Connect:
SSD → SATA Adapter → USB Port
If your system supports USB 3.0, use it whenever possible because transfer speeds will be much faster.

Possible USB Compatibility Issues
In my testing, I occasionally encountered situations where a USB 3.0 SATA adapter was not properly detected on older systems.
This may happen because of:
- Driver compatibility issues
- USB controller limitations
- Adapter compatibility problems
If the SSD is not recognized:
- Try another USB port
- Try a USB 2.0 port
- Use a USB hub
- Reconnect the adapter
Interestingly, some older laptops detect drives more reliably through a USB 2.0 connection.
While transfer speeds may be slower, it often solves detection problems.
Step 3: Verify That the SSD Is Detected
Open:
Disk Management
or
DiskGenius
Make sure the SSD appears in the list of available drives.
If the SSD is not visible:
- Check all connections
- Reconnect the adapter
- Restart the computer
- Test another USB port
Do not continue until the SSD is detected correctly.
Step 4: Launch the OS Migration Tool
Open DiskGenius.
On the main screen, click:
OS Migration
This feature is specifically designed for transferring Windows from one drive to another.
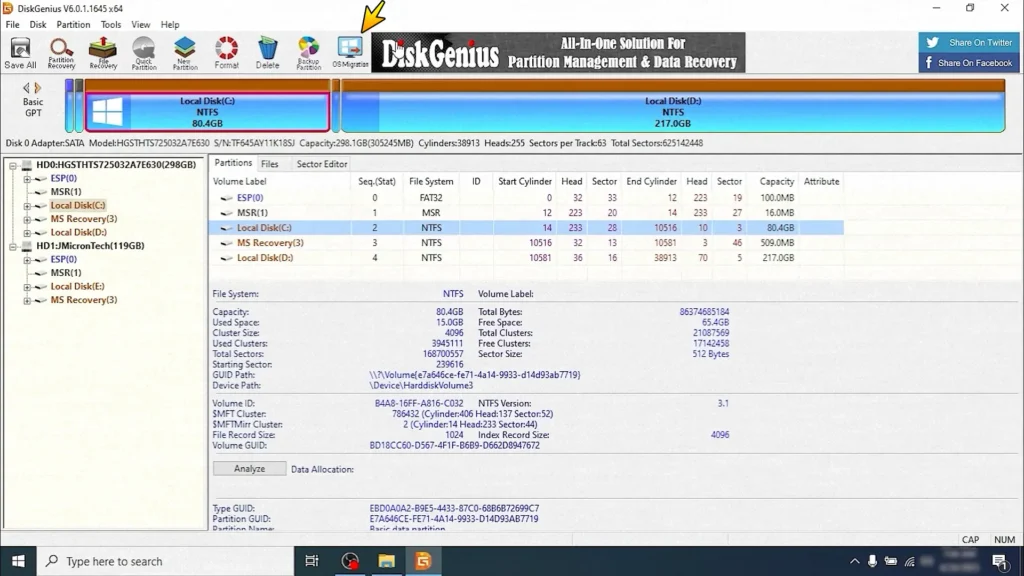
A migration wizard will appear.
Step 5: Select the Source Partition
Choose the partition that contains Windows.
For most users, this is:
C: Drive
Verify that you selected the correct system partition before continuing.
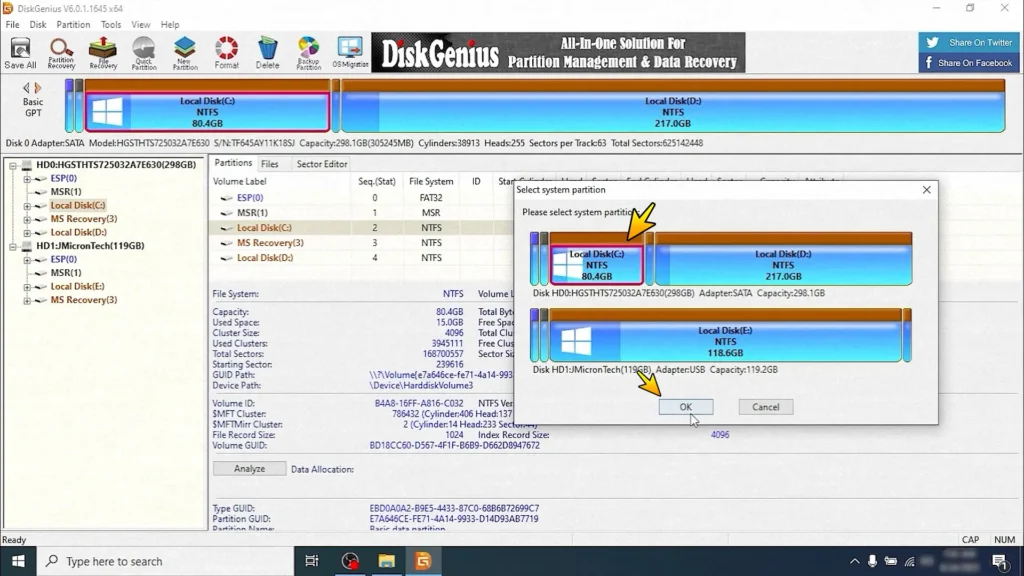
Click OK.
Step 6: Select the Destination SSD
Now choose your SSD as the destination drive.
DiskGenius will display all available storage devices connected to the system.
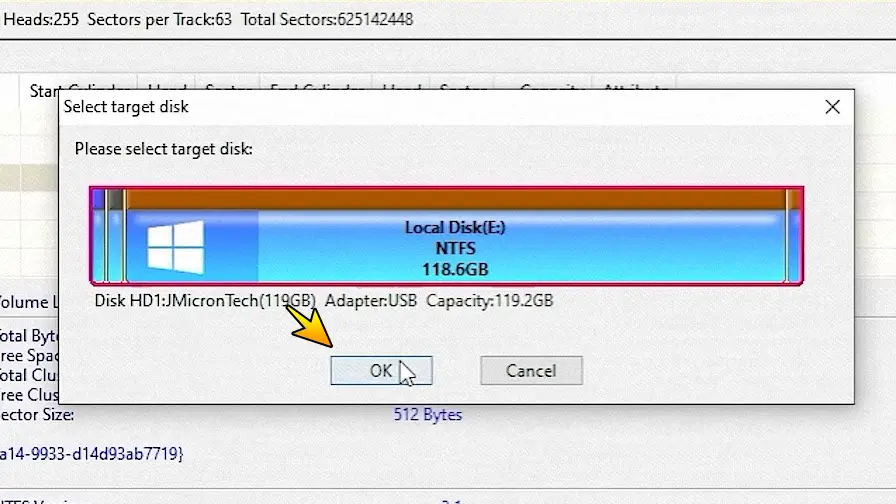
Select your SSD and click OK.
A warning message will appear indicating that all existing partitions on the SSD will be removed.
If you have already backed up important data, confirm the warning.

Step 7: Adjust Partition Layout
One useful feature of DiskGenius is the ability to resize partitions before migration.
This can be useful when:
- The SSD is smaller than the original HDD
- You want to allocate more space to Windows
- You want to reorganize storage
For example:
- HDD: 500 GB
- SSD: 240 GB
You can resize partitions to fit within the available capacity while still preserving your data.
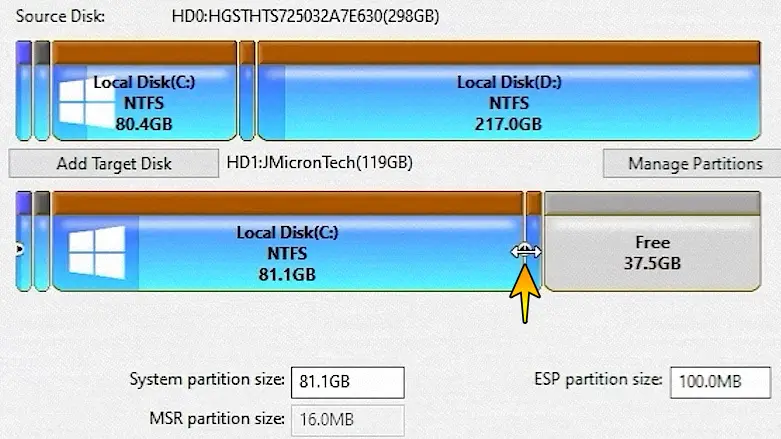
Make sure the Windows partition has enough free space for future updates and applications.
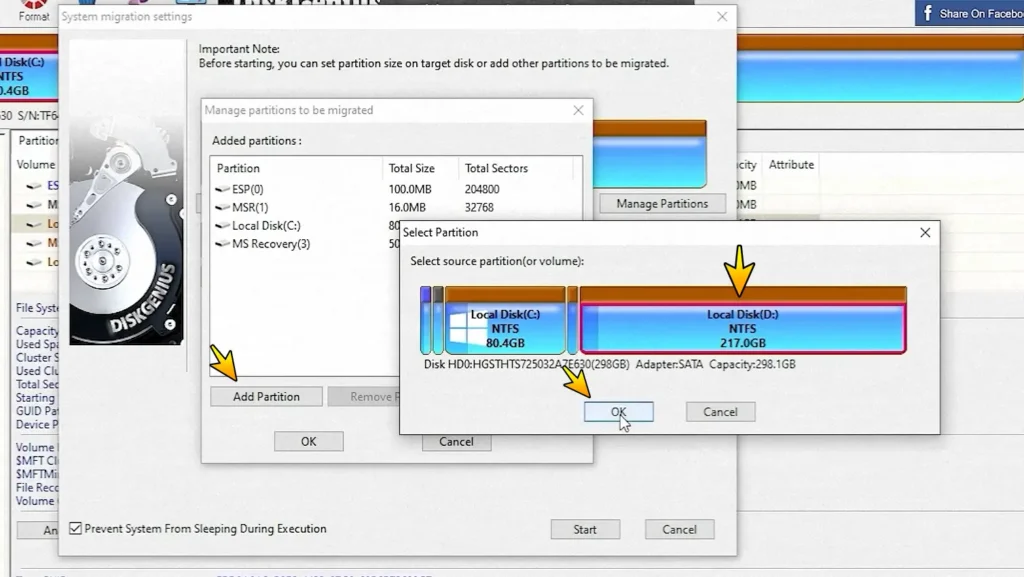
Step 8: Copy Additional Partitions
Many systems contain multiple partitions.
For example:
- C: Windows
- D: Personal Files
DiskGenius allows you to transfer additional partitions to the SSD.
If you want the new SSD to function exactly like the original drive, copy all required partitions.
You can manually adjust their sizes before starting the transfer.
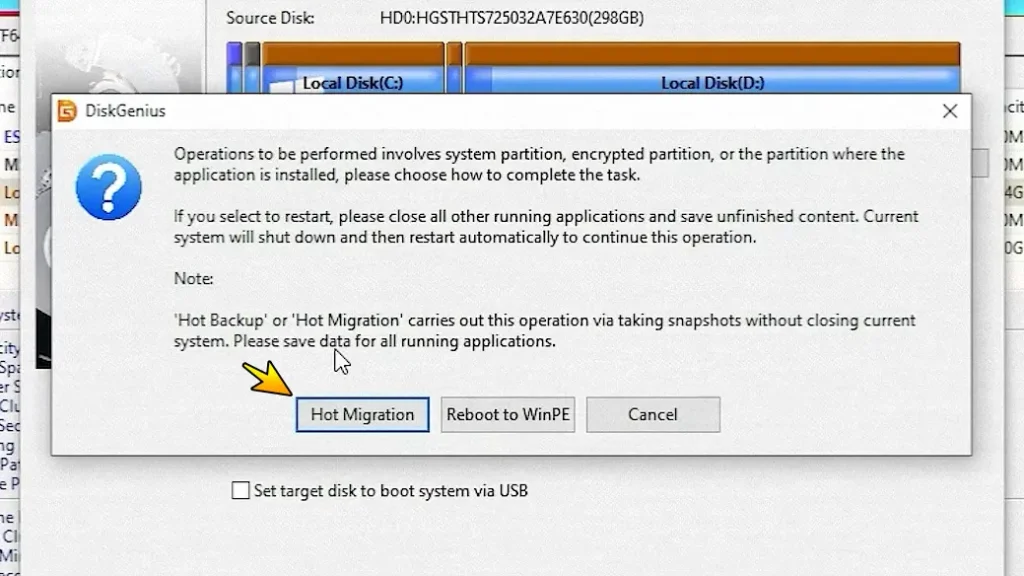
Step 9: Start the Cloning Process
Once everything looks correct, click:
Start
Next, choose:
Hot Migration
DiskGenius will begin transferring Windows and all associated files to the SSD.
The required time depends on:
- Drive size
- Amount of data
- USB speed
- System performance
The process may take anywhere from a few minutes to several hours.
During migration:
- Do not disconnect the SSD
- Do not restart Windows
- Avoid shutting down the computer
Patience is important here.
Sometimes the best thing you can do is simply let the software finish its work.
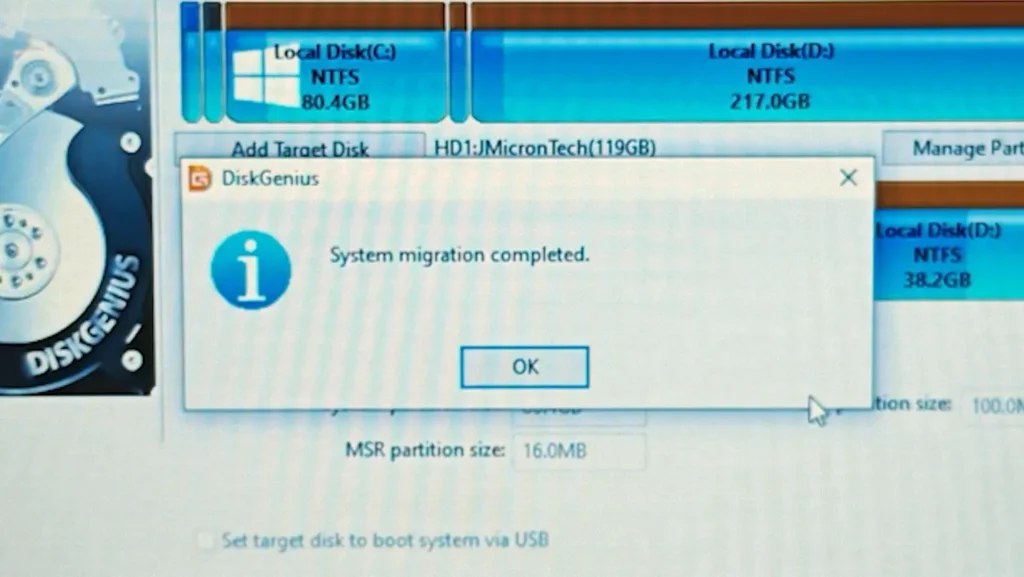
Step 10: Wait for Migration to Finish
Once the process is complete, DiskGenius will display a confirmation message.
The software may even show a preview of the migrated system structure on the SSD.
At this stage:
- Close DiskGenius
- Safely eject the SSD
- Shut down the computer
The transfer process is now complete.
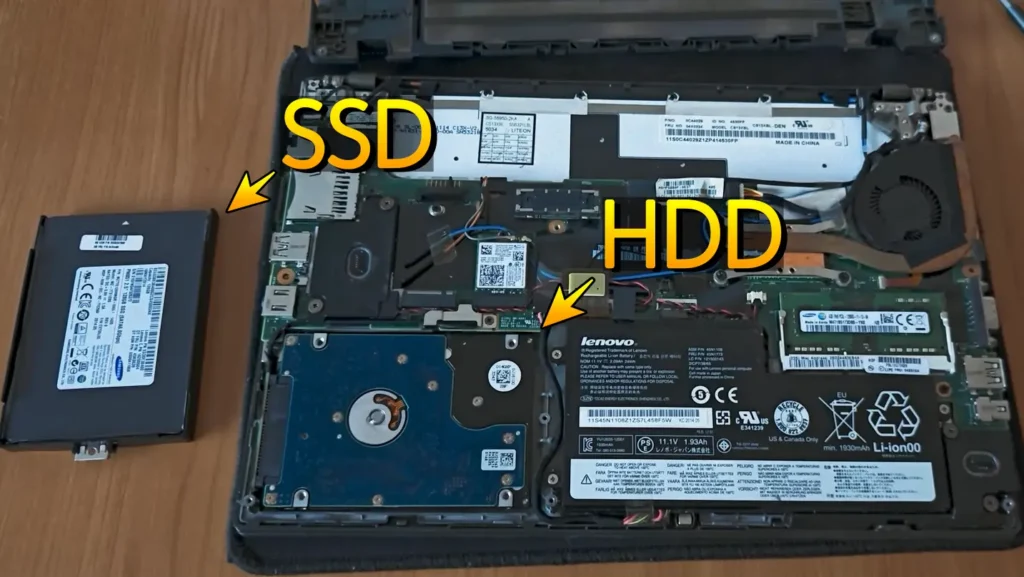
Step 11: Replace the HDD with the SSD
Now it is time for the physical upgrade.
The exact procedure depends on your computer model.
Generally, the process involves:
- Powering off the system
- Disconnecting the charger
- Removing the battery if possible
- Opening the service cover
- Removing the HDD
- Installing the SSD
Always consult your laptop’s maintenance manual if you are unsure how to access the storage compartment.
Safety Reminder
Before opening any laptop:
- Disconnect power
- Remove the battery if possible
- Ground yourself to avoid static discharge
Taking these precautions helps prevent accidental damage.
Step 12: Boot Windows from the SSD
After installing the SSD, turn on the computer.
If everything was transferred successfully, Windows should start normally.
Your desktop, applications, files, and settings should appear exactly as before.
The only major difference should be the significantly improved performance.
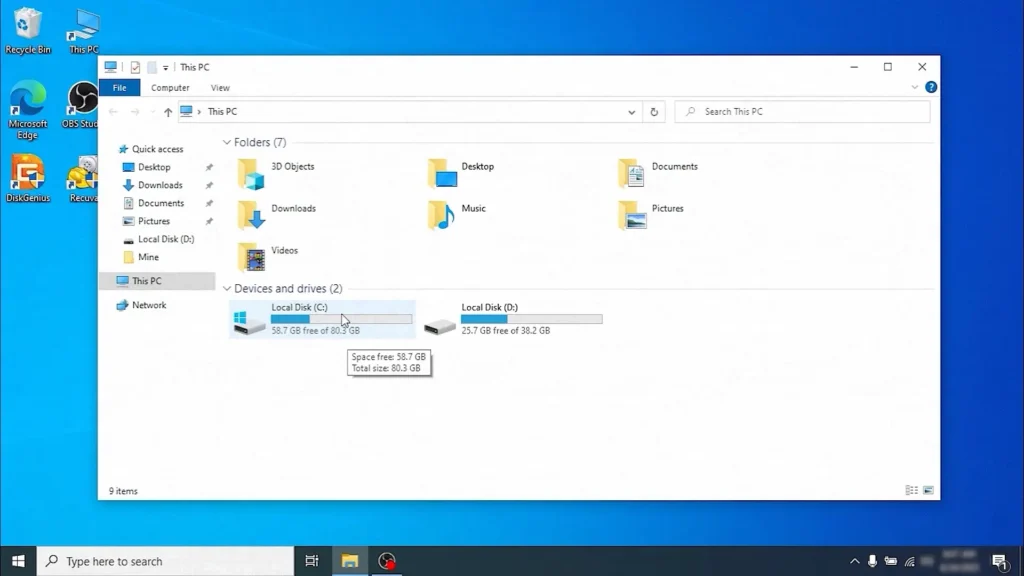
Verify That Everything Works Correctly
Before considering the upgrade complete, perform a few quick checks.
Check Your Files
Open:
- Documents
- Downloads
- Pictures
- Videos
Make sure your files are present.
Test Applications
Launch several commonly used programs.
For example:
- Google Chrome
- Microsoft Office
- Steam
- Adobe applications
Verify that everything opens normally.
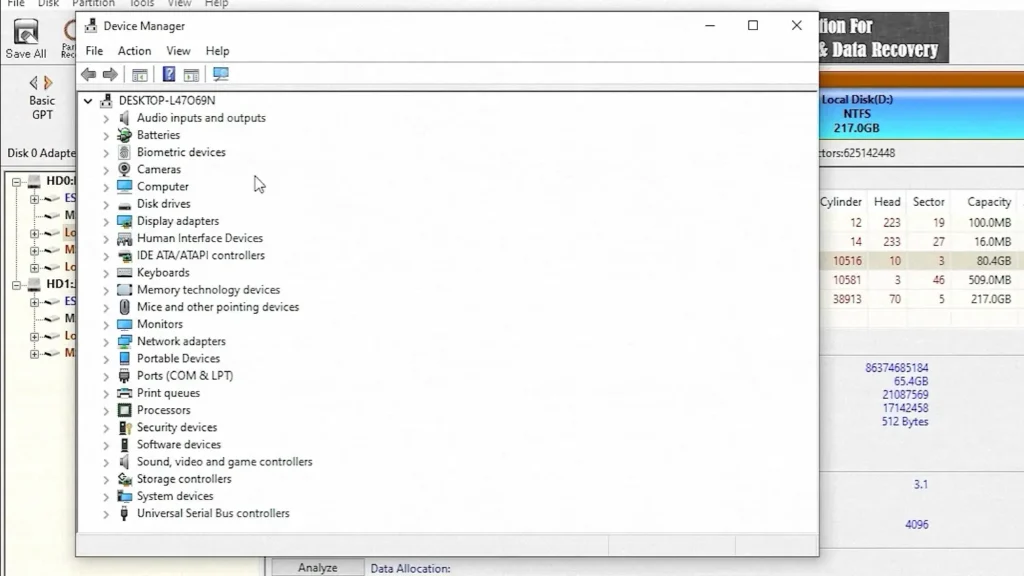
Check Device Manager
Open Device Manager and verify that no devices show warning icons.
In most cases, drivers continue working normally after migration because they are preserved as part of the Windows installation.
My Experience After Upgrading from HDD to SSD
In my testing, the migration process completed successfully without requiring a Windows reinstallation.
After replacing the HDD with the SSD:
- Windows booted normally
- All files remained available
- Installed applications continued working
- Existing drivers remained functional
- Partitions were preserved
The system felt noticeably faster and more responsive immediately after the upgrade.
This is one of the reasons why SSD upgrades remain one of my favorite recommendations for older laptops.
Common Problems and Solutions
SSD Does Not Boot
Possible causes include:
- Incorrect boot order
- UEFI and Legacy mode mismatch
- Incomplete migration
Check BIOS settings and ensure the SSD is selected as the primary boot device.
SSD Is Not Detected
Try:
- Another USB port
- Another SATA adapter
- Another cable
Also verify that the SSD itself is functioning correctly.
Windows Feels Slow After Migration
Possible causes:
- Background indexing
- Windows updates
- SSD firmware issues
Allow Windows some time to complete background tasks after the first boot.
Missing Files
If some files appear to be missing:
- Check drive letters
- Verify hidden folders
- Compare partitions with the original drive
Keeping the old HDD untouched until testing is complete is always a good idea.
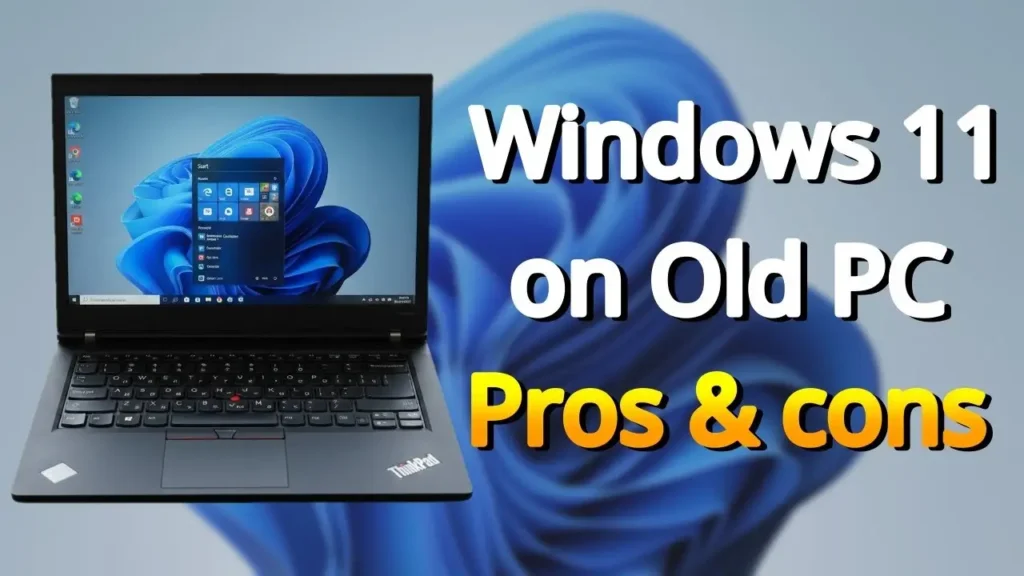
Running Windows 11 on Older Hardware
If you are upgrading an older laptop, you may also be interested in my guide about running Windows 11 on unsupported hardware.
Many older systems that receive an SSD upgrade can run Windows 11 surprisingly well with the right configuration.
Frequently Asked Questions
Can I clone Windows 11 to an SSD for free?
Yes.
DiskGenius Free includes a migration feature that allows you to transfer Windows without purchasing additional software.
Will I lose my files?
Files on the original HDD remain untouched.
However, all existing data on the destination SSD will be erased.
Can I clone an HDD to a smaller SSD?
Yes, as long as the amount of used data is smaller than the SSD capacity.
Can I use a SATA-to-USB adapter?
Absolutely.
This is one of the most common methods for connecting an SSD during migration.
Do I need to reinstall drivers?
In most cases, no.
Existing drivers are preserved during the migration process and continue working normally.
Can I migrate Windows from SSD to SSD?
Yes.
The same procedure can be used to move Windows from one SSD to another SSD.
Can I clone Windows to an NVMe SSD?
Yes.
However, you may need a compatible NVMe enclosure or adapter depending on your hardware.
Should I keep my old HDD after migration?
Yes.
It is a good idea to keep the original drive untouched until you have confirmed that everything works properly on the SSD.
Final Thoughts
If your computer still relies on a traditional hard drive, upgrading to an SSD is one of the most effective ways to improve performance.
Instead of spending hours reinstalling Windows, applications, and drivers, you can transfer everything to the new drive and continue working almost immediately.
Using a free tool such as DiskGenius makes the process accessible even for beginners.
As long as you back up important files, verify that the SSD has enough capacity, and carefully select the correct source and destination drives, the migration process is usually straightforward and successful.
For older laptops especially, an SSD upgrade can make a dramatic difference. Faster boot times, quicker application launches, and a more responsive system can make an aging computer feel useful again without spending money on an entirely new machine.